Overview
You can verify your site's domain ownership with Google using any of several options: uploading an HTML file, adding a meta tag to your homepage, adding Google Analytics code, using Google Tag Manager, or adding a TXT or CNAME record in the DreamHost panel.
Background
Google requires domain ownership verification for some of its services. If you register a domain, manage your DNS, or host your site with DreamHost, Google provides several options to verify your domain name as described in Google’s documentation on domain verification.
Google site verification is different from your Google Analytics tracking ID#. See this article for information about how to add your Google Analytics tracking code to your site.
How do I verify my site?
You can use any option mentioned in the following sections. It's also recommended to add more than one to ensure your site remains verified in case an option is accidentally removed.
Option 1 — Uploading an HTML file
This option downloads an HTML file from your Google console and uploads it to your DreamHost website. Your site must be hosted at DreamHost to use this option.
To learn more about this process, please see this article.
Option 2 — Adding a meta tag to your homepage
This option adds a line of code to your site's homepage file. To use this option, your site must be hosted at DreamHost, and your HTML code must be editable.
To learn more about this process, please see this article.
Option 3 — Adding Google Analytics code
This option adds Google Analytics code to your site. You must be an administrator on the Google Analytics account to use this option. You can use your gtag.js snippet.
To learn more about this process, please see this article.
Option 4 — Using Google Tag Manager
This option searches for a Google Tag Manager snippet added to your website. If the page does not have a snippet, you must add one (which may require creating a Google Tag Manager account if you don't already have one).
To learn more about this process, please see this article.
Option 5 — Adding a TXT or CNAME record in the DreamHost panel
This option adds a DNS record through your DreamHost panel. You must first log in to your Google search console to retrieve the record to verify your site, which requires that your domain uses DreamHost’s nameservers. However, you do not need to have an active hosting plan to verify your domain using this option.
To learn more about this process, please see this article.
TXT record
See this article for instructions on how to add a TXT record.
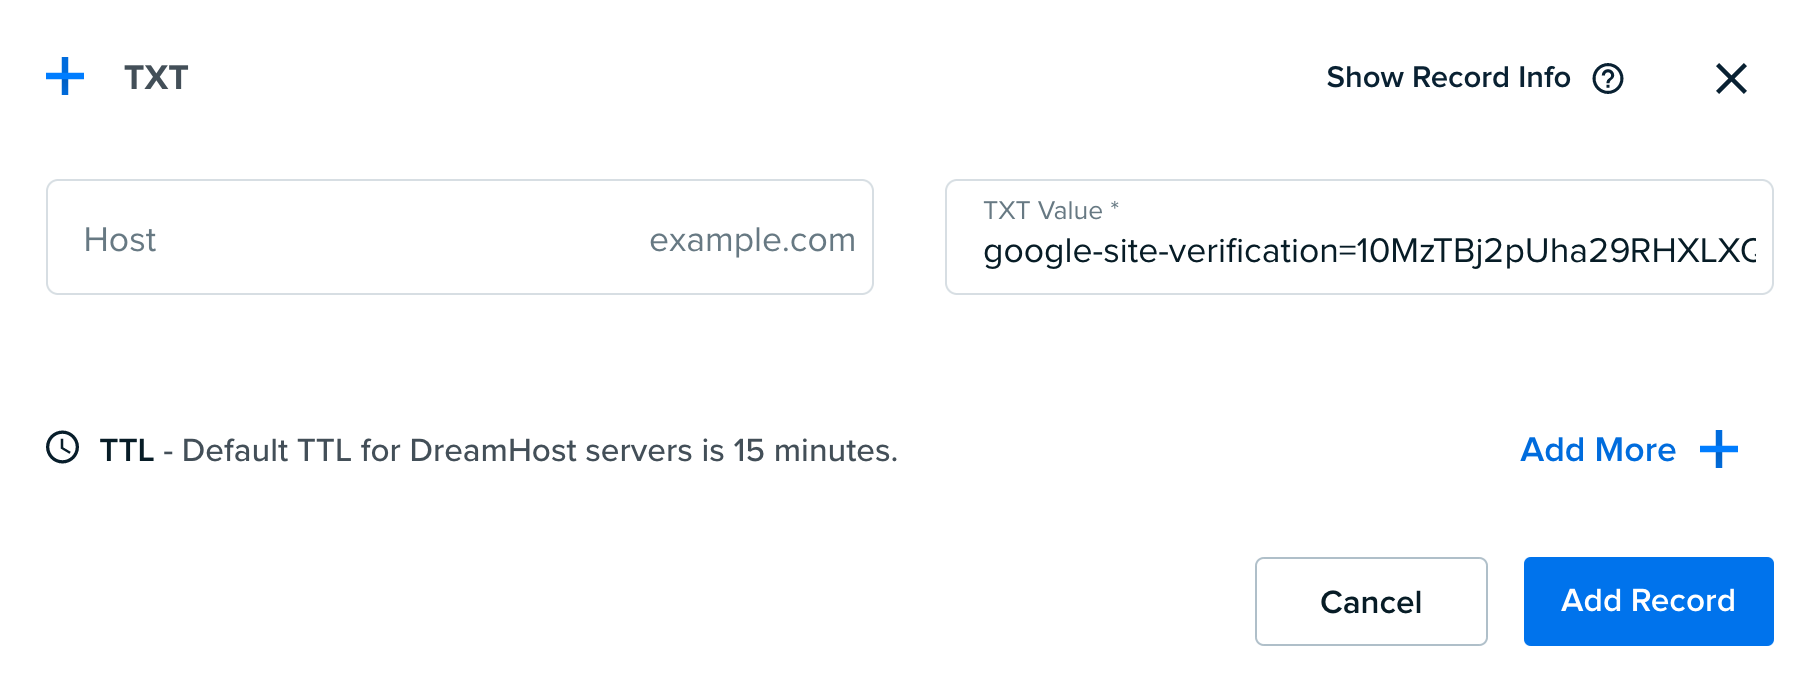
When you add a TXT record, you may see the verification fail because the record has not updated online yet. The record can take up to 4 hours to propagate online, but it's usually available sooner. Check back in a few hours, and Google will verify the TXT record.
CNAME record
See this article for instructions on how to add a CNAME record.

Make sure you are aware of the following when editing the CNAME record:
- Do not add the period at the end as shown in the Google console.
-
Do not add the primary domain printed in the CNAME Label field. If you are adding this for a subdomain such as blog.example.com, only copy the CNAME Label and subdomain portion while excluding the primary domain of example.com.
For example, in the image above, the full record is:##########.blog.example.com
You only need to enter ##########.blog into the Host field.
When you add a CNAME record, you may see the verification fail because the record has not updated online yet. The record can take up to 4 hours to propagate online, but it's usually available sooner. Check back in a few hours, and Google will verify the CNAME record.