Overview
You can transfer a domain registration you purchased at another company to DreamHost. Before requesting the transfer, unlock the domain and obtain its auth (EPP) code at your current registrar, then submit the transfer-in request and payment in your DreamHost panel.
Transferring your registration only transfers your domain name. See this article for instructions on transferring your hosting service to DreamHost.
What should I review before requesting a transfer?
Make sure you review the following before proceeding with the transfer.
FAQs
See the Transfer DomReg FAQs article for a list of answers to common transfer questions.
60 day transfer lock
Make sure you have not transferred or registered the domain name in the last 60 days. Due to ICANN's Transfer Policy, any change made to the registrant's name, organization, or email address will put the domain in a 60-day transfer lock; it will also trigger notification emails sent to the old and new registrants notifying them of the change. Visit this article for further details.
Unlock the domain and obtain an Auth code
You must complete the following steps at the company where the domain is registered before submitting the transfer request.
- Unlock the domain registration at your registrar.
- Obtain the auth code, also known as the EPP code, from your current registrar. This code is necessary to complete the transfer-in request.
Account balance
You must resolve any outstanding DreamHost account balance before you can transfer in a domain registration.
Transferring .CO.UK registrations
.CO.UK domains do not utilize the standard transfer lock process or authorization (EPP) code process. Instead, you must contact your current registrar and ask them to update the IPS tag on your domain to DreamHost's tag, which is ENOM.
IPS tags are case-sensitive, so make sure ENOM is in capital letters.
Once updated, the domain is in limbo until you submit the transfer in your DreamHost panel and the process completes.
How do I transfer a registration?
The following steps transfer a domain registration to DreamHost.

Requesting the transfer
Log into the account you're going to transfer the registration to. If you do not yet have an account, sign up for one on the website.
- Navigate to the Transfer Domains page and click the Start Transfer to DreamHost button.
- Enter a domain name (or multiple domain names on each line) that you wish to transfer to your account with DreamHost.
- Click the Request Transfer button to proceed.

Entering the auth code, contact information, and nameservers
On the next page, you must fill in the ownership details. Here, you can enable free privacy protection to hide your personal contact details in a public registration lookup.
Enable Privacy
Check the box titled I want all my contact information private. This way, it is set when the transfer completes.
The privacy setting is free, but DreamHost does not offer this for all TLDs. If you do not see the checkbox for the transfer-in of your domain, that particular TLD is not supported with this feature.
Ownership details
The following portion of the contact information form is where you enter your ownership details for the domain registration. This must include valid address and contact information as per ICANN’s policy:
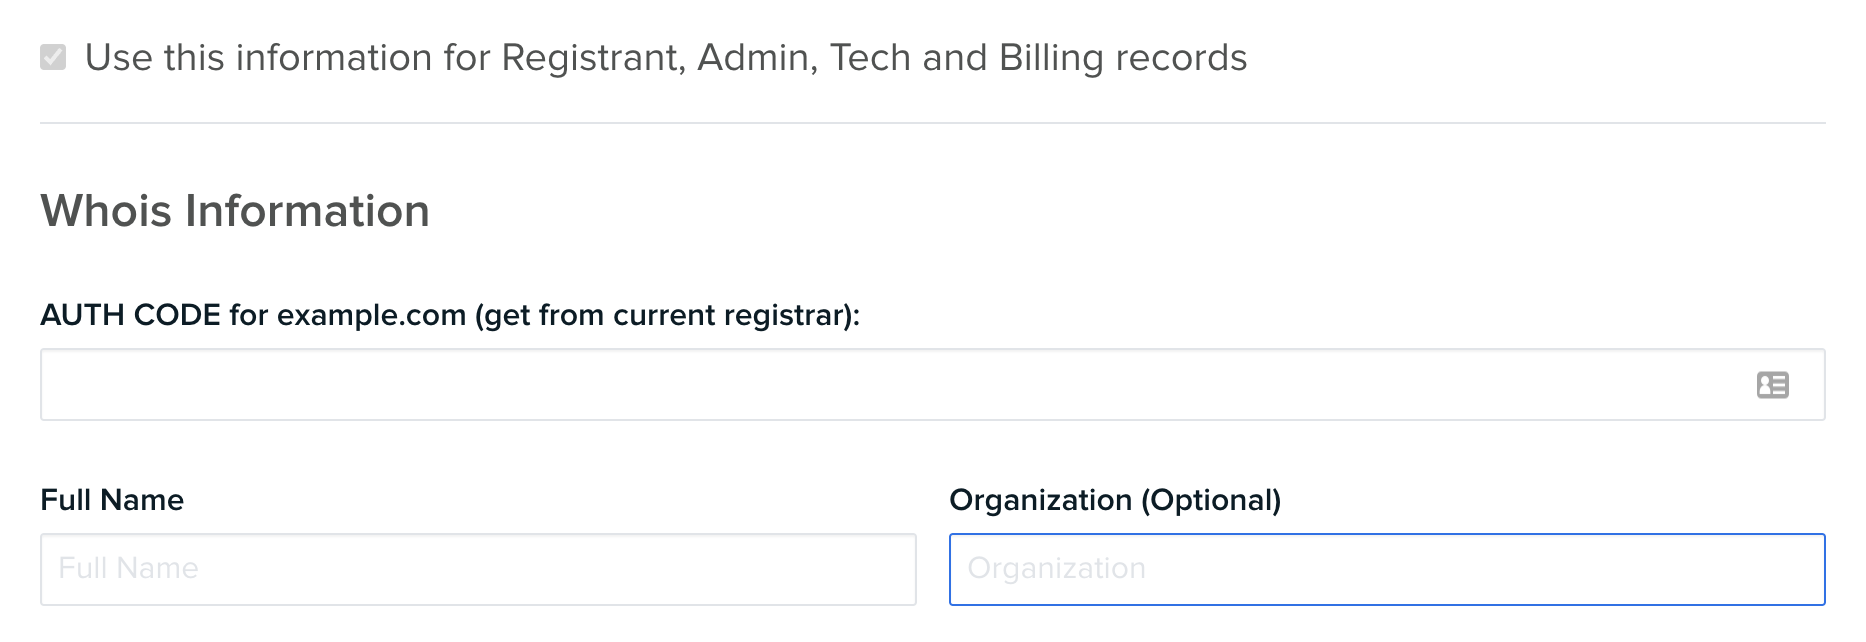
- Checkbox — Check the checkbox at the top of this form to apply the details entered in the contact fields to the Registrant, Admin, Billing, and Technical details contacts.
- AUTH CODE — Enter the auth code or EPP code for the domain registration transfer. You must make sure you enter it exactly as it was provided to you by your current registrar.
Nameservers
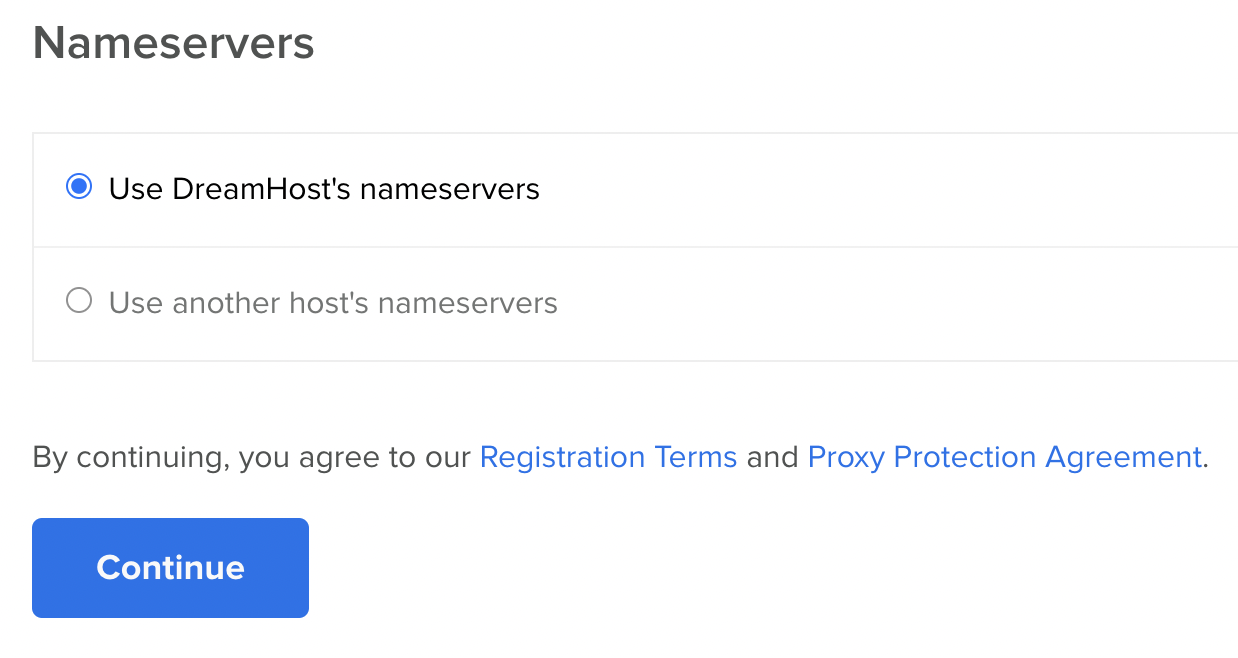
The last section of the transfer request page is where you can set the domain registration’s name servers.
- Use DreamHost's nameservers — automatically sets DreamHost's nameservers for you.
- Use another host's nameservers — opens fields where you can enter the external nameservers you wish to use.
Registration Terms
The Registration Terms appear. Make sure to read these before proceeding. When ready, click the Continue button to move on to the payment screen.

Paying for the transfer
You are charged for the incoming domain transfer unless you have a free domain registration credit available.
If you need to pay for the transfer, the cost of the transfer of that particular TLD is listed on the order page for you to review before you proceed. Any payment you make is held as a credit balance on the account until the transfer completes. The charge for the transfer is then applied.
- Click the Proceed to Payment Entry button to continue.
-
Enter your payment method, and then click the confirmation button for the payment method you selected.
The single transfer fee applies both to the transfer and the new year of the registration beyond the current expiration date.
- Click Submit Transfer Request.
- Navigate back to the Transfer Domains page to see the status is pending.

The transfer request is verified and submitted
Once the transfer is submitted in your DreamHost panel:
- The domain's unlock status and EPP/transfer authorization code are verified with your current registrar.
- If both are correct, the domain transfer is submitted to the registry, and the domain's status changes to pendingTransfer.
- You can check that status by performing a registration query on the domain registration.
At that time, your current registrar has 5 days to release the domain to DreamHost, and the transfer then completes within 7 days of the domain's status change.
If the domain is not fully unlocked, or if the EPP/transfer authorization code is denied by your current registrar, DreamHost will send you a message notifying you that the transfer has failed. For more specifics on the exact issue that caused your transfer to fail, please contact DreamHost support.
How do I cancel a domain transfer?
If you've submitted a transfer request in the panel but need to cancel it, you can do so within the panel.
- Navigate to the Transfer Domains page.
- Click the Cancel button for the domain that is transferring to DreamHost.
- When prompted, click the Confirm button. The request is canceled and a confirmation note appears.