Overview
This article covers the basic steps for setting up your website with DreamHost after you purchase an account: basic setup, adding a hosting plan, uploading or building your website, adding an SSL certificate, and additional configurations such as email and site statistics. It doesn't cover everything, but it covers what you need to get started.
Get a free, handcrafted WordPress website
The DreamHost WordPress support team can create a custom WordPress site for you. See this article for more details.
Step 1: Basic setup
Step 2: Add a hosting plan
Step 3: Uploading or building your website
Step 4: Add an SSL certificate
Step 5: Additional configurations
- Creating an email address
- Adding site statistics
- Adding the DreamShield website security service
- Contacting support
Step 1: Basic setup
Creating a DreamHost account
If you wish to use any DreamHost services, you must create an account. View this article for instructions on how to open an account.
Logging into the panel
After signing up, you’ll receive a message to notify you that your account is active. This email also contains credentials for you to log in to the panel at:
Registering a domain
To load any web page, the owner must first own the registration of the domain name. To register a domain, navigate to the Find New Domains page.
On the Register Domains page, you can register any domain that is available.
DreamHost offers many different Top Level Domains (TLDs) for you to register. You can view a full list on the Register Domains page by clicking the See full pricing link. See this article article for further information.
Step 2: Add a hosting plan
After you purchase a registration, you must add a hosting plan so the domain can be displayed online. You can choose from several different hosting options.
- Fully hosted — your site is hosted on a server and is visible online
- WordPress — your site is still Fully Hosted, but it's running the software for WordPress
- DreamPress — your site is Fully Hosted and running WordPress, but it's hosted on the DreamPress plan
Adding a hosting plan
To add a hosting plan to your account, navigate to the Manage Account page.
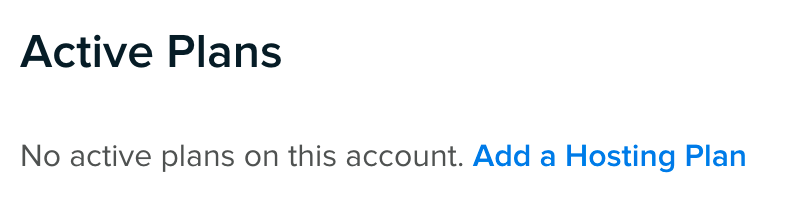
On the Manage Account page, you’ll see a section titled Active Plans.
If you already added a plan, you’ll see it listed here. If you do not see a plan, add one by clicking the Add a Hosting Plan link.
Adding hosting to a domain
View the Adding a website and hosting article for instructions on how to add hosting to your domain so it is Fully Hosted.
Pointing DNS
Even if your site is FULLY HOSTED in your panel, it still does not mean it is hosted at DreamHost. Your DNS records control where your domain is hosted, so they must point to your DreamHost server.
View the Where is my website hosted? article to confirm where it's currently hosted and how to point DNS to DreamHost.
Step 3: Uploading or building your website
Once your website is hosted on a web server, you can upload your website content to it, or use WordPress to build it.
Uploading your website content
Website files
If you already have your website built, you can upload all of its files via FTP to your web server. View this article for instructions on locating your FTP credentials and uploading your files.
Database
If your website uses a database, you must first create it in the panel. Then, you can import your existing database via phpMyAdmin.
WordPress options
If you do not already have a website created, you can use WordPress to build it. The following describes WordPress options available at DreamHost.
Adding WordPress
WordPress is the world's most popular content management system (CMS), and DreamHost is one of the very few recommended providers by WordPress.org. If you're new to hosting a website, you'll want to check out WordPress to help you build your website. Within minutes, you can build a site that incorporates all of the modern features that websites now include, with a nearly limitless capacity to add new features as you need them.
To help you get started with building a WordPress site at DreamHost, please see the following articles:
- Install WordPress using the DreamHost WordPress installer
- DreamHost WordPress Hosting plans
- DreamHost Guide to WordPress
DreamPress Hosting
DreamPress is DreamHost's managed WordPress product, which provides even more powerful features such as larger memory & storage plans, faster speeds, and improved caching. See the DreamPress article for further information.
WordPress migration options
View this article article for a list of the different options available to migrate WordPress.
WordPress Migration Service
If you are having trouble migrating your website from another host, or just don't have the time, DreamHost currently offers a WordPress Migration Service that takes care of that for you. You can find more information in the DreamHost Website migration services article.
If your WordPress site is already hosted at DreamHost and you need to migrate it to another DreamHost account, view the following article instead.
Step 4: Add an SSL certificate
Adding an SSL certificate to a domain
After you set up hosting for your domain, it's highly recommended that you also add an SSL certificate to it (either a free Let's Encrypt or a professionally-signed certificate). Adding a certificate is a simple process that not only secures your site for transactions and eCommerce, but also ensures that your site is viewed as secure and safe to visit.
To help you get started with adding a certificate, please see the following articles:
Step 5: Additional configurations
The following are additional services or products you can add to your site, but are not mandatory in order for it to operate.
Creating an email address
Once your domain is hosted, you can then proceed with adding email addresses to it.
It is also possible to host your email outside of DreamHost by configuring custom MX records to point to your external mail host.
Adding site statistics
All DreamHost accounts have the ability to add site statistics to any non-DreamPress fully-hosted website, which you can enable on the Site Statistics page. There, you can track information such as the number of requests, traffic by domain, traffic by file, requests by browser types/OSs/URLs, and more.
To find out more about adding site statistics to your site, please see the following articles:
Adding the DreamShield website security service
DreamHost also offers a paid security service in the panel. When enabled, this service allows you to scan your website for malware and alerts you if any issues are found.
To learn more about how to enable the Website Security service, see the Enable and manage DreamShield article.
Contacting support
If there’s anything support may assist you with regarding setting up and loading your website, feel free to submit a support ticket on the Contact Support page of your panel.