Overview
This article walks you through how to add a new domain and then choose how it is configured. Configuration options include:
- Migrating your site to DreamHost
- Installing WordPress
- Building a site using a no-code tool (Remixer)
- Setting your domain to Mirror another website
Each of these options is described in detail within the following sections.
Step 1 — Select a type of domain
This step adds a new domain name to your DreamHost panel.
First, select the type of domain to add to your panel.
- Navigate to the Manage Websites page.
- On the top right, click the Add Website button.
- Select one of the following options depending on the type of domain you wish to configure:
- Enter Domain Name (example.com) — Add a domain name that you have already registered, either with DreamHost or another provider. You can also enter a new domain to register at DreamHost.
- Create a Subdomain (blog.example.com) — Add a new subdomain to an existing domain in the account. See this article for more information.
- Free Temporary Domain (mysite.dreamhosters.com) — Add a temporary dreamhosters.com subdomain. See this article for more information.
After the domain is added to your panel, continue with choosing a configuration option.
Step 2 — Choose how to configure your domain
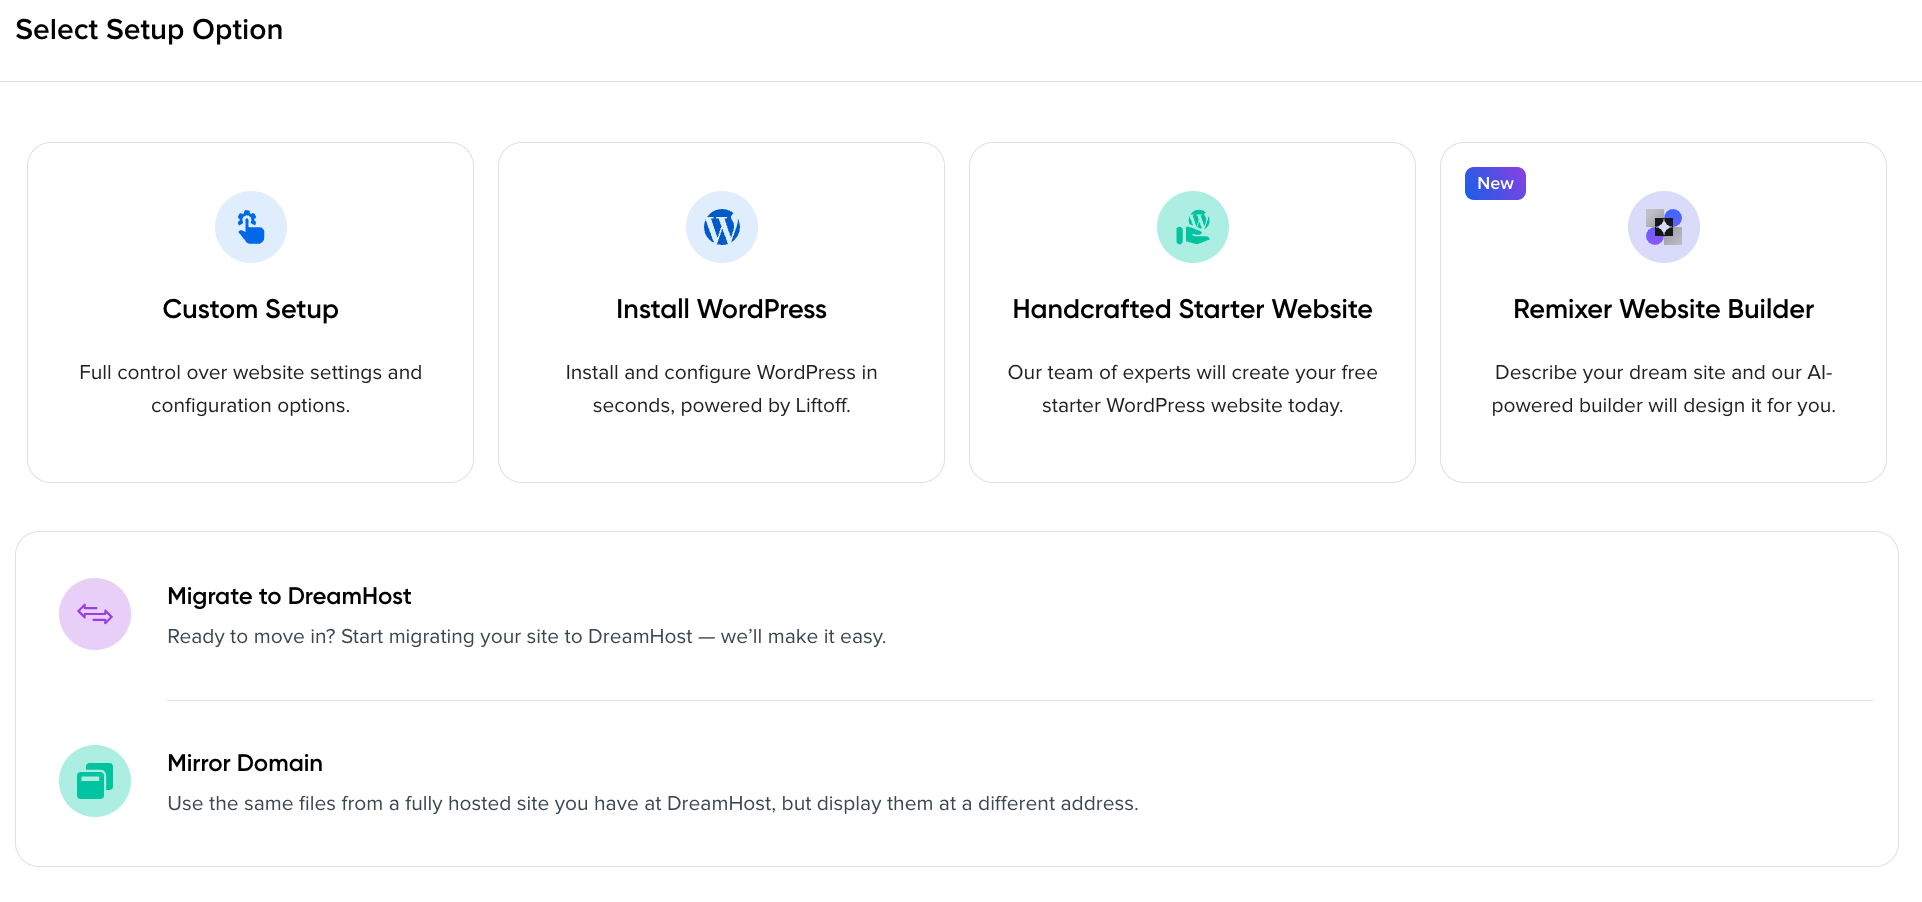
Choose one of the following options to configure your domain.
Hosted options
DNS Only domains
If you have already added a domain and configured it as DNS Only, first check if you have previously added any custom A or CNAME records before adding hosting.
If you've added custom records, you’ll need to remove them to avoid conflicts with the new configuration.
- Custom Setup — Manually add hosting and content
- Install WordPress — Install WordPress automatically in the panel
- Handcrafted Starter Website — Request DreamHost experts to build your WordPress site
- Remixer Website Builder — Create and publish a static website using the AI-powered Remixer tool—no coding required.
- Migrate to DreamHost — Migrate an existing site to DreamHost
Non-Hosted option
- Mirror Domain: Mirror another DreamHost website
Custom Setup
This option allows you to add hosting and upload your website content yourself.
- Select Custom Setup.
- Choose the type of web server to host your website.
- Choose a user name to manage your website files on the server. You can either create a new user (recommended) or select an existing one.
- Click the dropdown arrow next to Advanced Settings to select your site’s web directory and choose a PHP version.
- Click Complete Setup to add the domain.
Please allow up to 15 minutes for your website to be added to the server and several hours for DNS records to propagate across the Internet.
Install WordPress
Use this option to install WordPress to help build a website quickly.
- Select Install WordPress.
- Choose the type of web server to host your website.
- Choose a user name to manage your website files on the server. You can either create a new user (recommended) or select an existing one.
- Click the dropdown arrow next to Advanced Settings to select your site’s web directory and choose a PHP version.
- Select Setup WordPress. The WordPress installation page opens, listing two options:
- Liftoff Website Builder by DreamHost — Select this option if you want to use the Liftoff Website Builder by DreamHost to build your website.
- Custom Installation — Select this option if you wish to manually create a WordPress website.
- Click Confirm Install to begin the WordPress installation process.
Handcrafted Starter Website
Use this option to request DreamHost's experts to help build a starter WordPress website for you.
Remixer Website Builder
Use this option to create, customize, and publish fast, static websites with no coding required. See this article for further details.
Migrate to DreamHost
Use this option to migrate an existing WordPress website from another host to DreamHost.
- Select Migrate to DreamHost.
- Choose the type of web server to host your website.
- Choose a user name to manage your website files on the server. You can either create a new user (recommended) or select an existing one.
- Click the dropdown arrow next to Advanced Settings to select your site’s web directory and choose a PHP version.
-
Click the Start Migrating button.
You are redirected to a page to scan your website for migration options. Please note that you will not be able to proceed with the scan until the website is added to the server, which may take up to 15 minutes.
- Enter the website you wish to migrate to DreamHost and click Scan Site. Once the scan completes, click See Migration Options. The migration page opens.
- Select the Manual option to manually migrate your site.
Mirror Domain
This is the only NON-hosted option in this list. Use this option to display content from another DreamHost website on your domain. See this article for further details.