Overview
This article explains how to create custom DNS records for your domain.
These types of records should only be added if your domain requires a specific service to function, such as hosting your email at another company or setting up Google site verification records.
Prerequisites
These instructions will only work if your nameservers are pointed to DreamHost. Before proceeding, make sure you've reviewed the DNS overview article and have an understanding of how DNS works.
Configuring your domain
You can add custom DNS records to a domain that is 'Fully hosted' or set to DNS only. It all depends on what records you are creating and why you need them.
- Fully Hosted domains: A Fully Hosted domain means you have added hosting to the domain so it's configured on a web server and can be visited on the Internet. Generally speaking, if you want your site hosted on DreamHost's servers, keep your site Fully Hosted.
- DNS Only: However, if you want your site to point away from DreamHost by creating A or CNAME records, the first step is to remove the hosting service already applied to your domain at DreamHost. View this article for instructions on how to set your domain to 'DNS Only'.
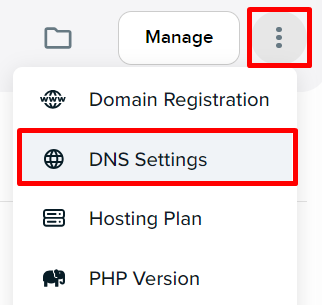
Accessing the Domain Settings page
You'll need to access your domain's settings page to add the custom records in this article. To access this page:
- Navigate to the Manage Websites page.
-
Open the DNS Settings page:
DNS Propagation
DNS updates can take several hours to fully update online. This process is known as 'DNS Propagation' and the time period can be different depending on the type of record updated. View the DNS propagation article for further details.
Adding custom DNS records
The following sections explain how to update specific DNS records in your DreamHost panel.
You do not need to add the following when creating a DNS record:
| Character | Description | Details |
|---|---|---|
| @ | The @ symbol | This is added automatically when the Name field is left blank. |
| . | A trailing . (period) | This is added automatically when the record is saved. |
A record
A records are IP addresses. They can be added to point your website to a different hosting company or subdomains of your website to external services.
- Click the Add Record button.
- Hover over the A Record section and click the ADD link.
-
Host: This is either the root domain or a subdomain (blog, store, etc). You do not need to add the domain name in the Host field.
- Root A record: If you want to create an A record for the root domain to point away from DreamHost, you must first set the domain to DNS Only. You can then leave this field blank.
- Subdomain A record: For a subdomain (blog, dev, shop, etc), enter the subdomain name in this field.
- Points to: Enter the IP address the subdomain will point to.
-
Host: This is either the root domain or a subdomain (blog, store, etc). You do not need to add the domain name in the Host field.
- Click the Add Record button to save.
AAAA record
AAAA records are IPv6 addresses. They can be added to point your website to a different hosting company or subdomains of your site to external services.
- Click the Add Record button.
- Hover over the AAAA Record section and click the ADD link.
-
Host: This is either the root domain or a subdomain. You do not need to add the domain name in the Host field.
- Root AAAA record: If you want to create an AAAA record for the root domain to point away from DreamHost, you must first set the domain to DNS Only. You can then leave this field blank.
- Subdomain AAAA record: For a subdomain (blog, dev, shop, etc), enter the subdomain name in this field.
-
Points to: Enter the IPv6 address the subdomain will point to. For example:
2607:f298:5:104f::765:5be
-
Host: This is either the root domain or a subdomain. You do not need to add the domain name in the Host field.
- Click the Add Record button to save.
ALIAS record
An ALIAS record (also known as ANAME record) is a virtual DNS record similar to a CNAME, but with the ability to add it to the root domain name (which is not possible with a CNAME). It can also be added to a subdomain record that already exists (where a CNAME must be unique).
To further clarify the difference between ALIAS and CNAME records:
| Record | Root domain (example.com) | Subdomain (blog.example.com) |
|---|---|---|
| ALIAS | It IS possible to add an ALIAS record to the root domain even if an A record is already assigned to it. | ALIAS records can also be added to an active subdomain. For example, if www.example.com or calendar.example.com already have A or CNAME records configured, you can still add an ALIAS record to those same names. |
| CNAME | It's not possible to add a CNAME record to the root domain. | The CNAME record is used to point a subdomain such as www.example.com or calendar.example.com to another service using a hostname (not an IP). CNAME records can only be added to a subdomain that is not currently using A records. |
Adding an ALIAS record
- Click the Add Record button.
- Hover over the ALIAS Record section and click the ADD link.
-
Host: This is either the root domain or a subdomain (blog, store, etc). You do not need to add the domain name in the Host field.
- Root record: If you want to create an ALIAS record for the root domain, leave this field blank.
- Subdomain record: For a subdomain (blog, dev, shop, etc), enter the subdomain name in this field.
- Points to: Enter the hostname location you’d like this record to point to.
-
Host: This is either the root domain or a subdomain (blog, store, etc). You do not need to add the domain name in the Host field.
- Click the Add Record button to save.
CNAME record
CNAME records can be used to point your hosting away from DreamHost. This record is created to point one domain to another as opposed to pointing one domain to an IP address (like the custom A record).
Please keep in mind that a CNAME record can only be created on a subdomain. This means the root record (example.com) cannot be a CNAME record.
- Click the Add Record button.
- Hover over the CNAME Record section and click the ADD link.
- Enter the following:
- Host: This field can be anything, but very often, it’s just www. Adding www points the www subdomain away from DreamHost. You do not need to add the domain name in the Host field.
- Points to: Enter the location you’d like this record to point to.
- Click the Add Record button to save.
It's possible you may see the following error when adding a CNAME:
You already have a record for this name. You can't have a CNAME and any other record on the same name.
This usually means that you're trying to add a CNAME for www, but since that record already exists in your DNS settings, you're not able to add a second one. If you need to add a CNAME for the www subdomain, you must set your domain to DNS Only first.
If you're attempting to add a CNAME for something else, review your DNS records to see if the record you're adding already exists.
MX records
MX records are DNS records that are necessary for delivering email. The company where your MX records are pointing is where your email is sent. There are two options to add MX records in the panel.
Option 1 — If your domain is hosted at DreamHost
If you've added hosting to your domain, you already have MX records configured at DreamHost.
If you need to host your email at another company while continuing to host your website at DreamHost, you must configure custom MX records to replace the current records in your panel. View this article for further information.
Option 2 — If your domain is not hosted at DreamHost
If your domain is registered at DreamHost but not configured on a hosting plan, you can add MX records to point your mail to another company.
This is only necessary if your nameservers are still pointing to DreamHost.
- Click the Add Record button.
- Hover over the MX Record section and click the ADD link.
- Host: This field is usually left blank. Only add something here if your new mail provider requires a host which is often a subdomain, such as www or mail. You do not need to add the domain name in the Host field.
- Points to: Enter the MX record to point to.
- Priority: Enter the priority number of this MX record. When adding multiple MX records, this value controls which MX record is used first.
- Only check the box titled I will still check my email at DreamHost if you are using a Mail Service Provider.
- Click the Add Record button to save.
TXT record
TXT (Text) records allow you to associate text with a specific host. A common example is adding a Google site verification record, or adding a DMARC email record to your site.
- Click the Add Record button.
- Hover over the TXT Record section and click the ADD link.
- Enter the following:
- Host: This field can be anything. Very often it’s left blank. You do not need to add the domain name in the Host field.
- TXT Value *: Enter the text value of this record to point to.
- Click the Add Record button to save.
NAPTR record
Name Authority Pointer (NAPTR) records are most often used for Internet telephony. These records support the use of regular expressions. Here is an example NAPTR record:
$ORIGIN 4.3.2.1.5.5.5.0.0.8.1.e164.arpa.
IN NAPTR 100 10 "U" "E2U+sip" "!^.*$!sip:customer-service@example.com!" .
IN NAPTR 102 10 "U" "E2U+email" "!^.*$!mailto:information@example.com!" .
View this link for detailed information about this type of record.
- Click the Add Record button.
- Hover over the NAPTR Record section and click the ADD link.
- Host: Enter the hostname to enable this record for, or leave blank. You do not need to add the domain name in the Host field.
- Order: A number (from 0 - 65535) that specifies the order in which multiple NAPTR records are processed. Lower values are processed before higher values.
- Preference: A number (from 0 - 65535) that specifies the order in which multiple NAPTR records, with equal Order values, are processed. Lower values are processed before higher values.
- Flags: A lowercase string containing flags to control aspects of the rewriting and interpretation of the fields in the record. At this time only four flags, s, a, u, and p, are defined.
- Service: Specifies the service(s) available down this rewrite path. It may also specify the particular protocol that is used to talk with a service.
- Regex: A string containing a substitution expression that is applied to the original string held by the client in order to construct the next domain name to lookup.
- Replacement: The next fully qualified domain name to query for NAPTR records depending on the values found in the flags field. This field is only used if the regular expression field is empty. If the Regex field contains a value, this field is not used.
- Click the Add Record button to save.
SPF record
Sender Policy Framework (SPF) records specify what mail servers are permitted to send email from your domain. View this article for details on settings up SPF records.
SRV record
SRV (service) records are used to identify computers that host a specific service and then establish a connection between that service and the website. Certain programs and applications may require these types of records to make their services active. A common example is the following two Microsoft SRV records. More information can be found at the following link:
| Type | Name | Target | Protocol | Service | Priority | Weight | Port | TTL |
|---|---|---|---|---|---|---|---|---|
| SRV | @ | sipdir.online.lync.com | _tls | _sip | 100 | 1 | 443 | 1 hour |
| SRV | @ | sipfed.online.lync.com | _tcp | _sipfederationtls | 100 | 1 | 5061 | 1 hour |
Format
Your standard SRV record is in this type of format:
_service._protocol.name. TTL class SRV priority weight port target.
Adding
The example below shows how to add the following record.
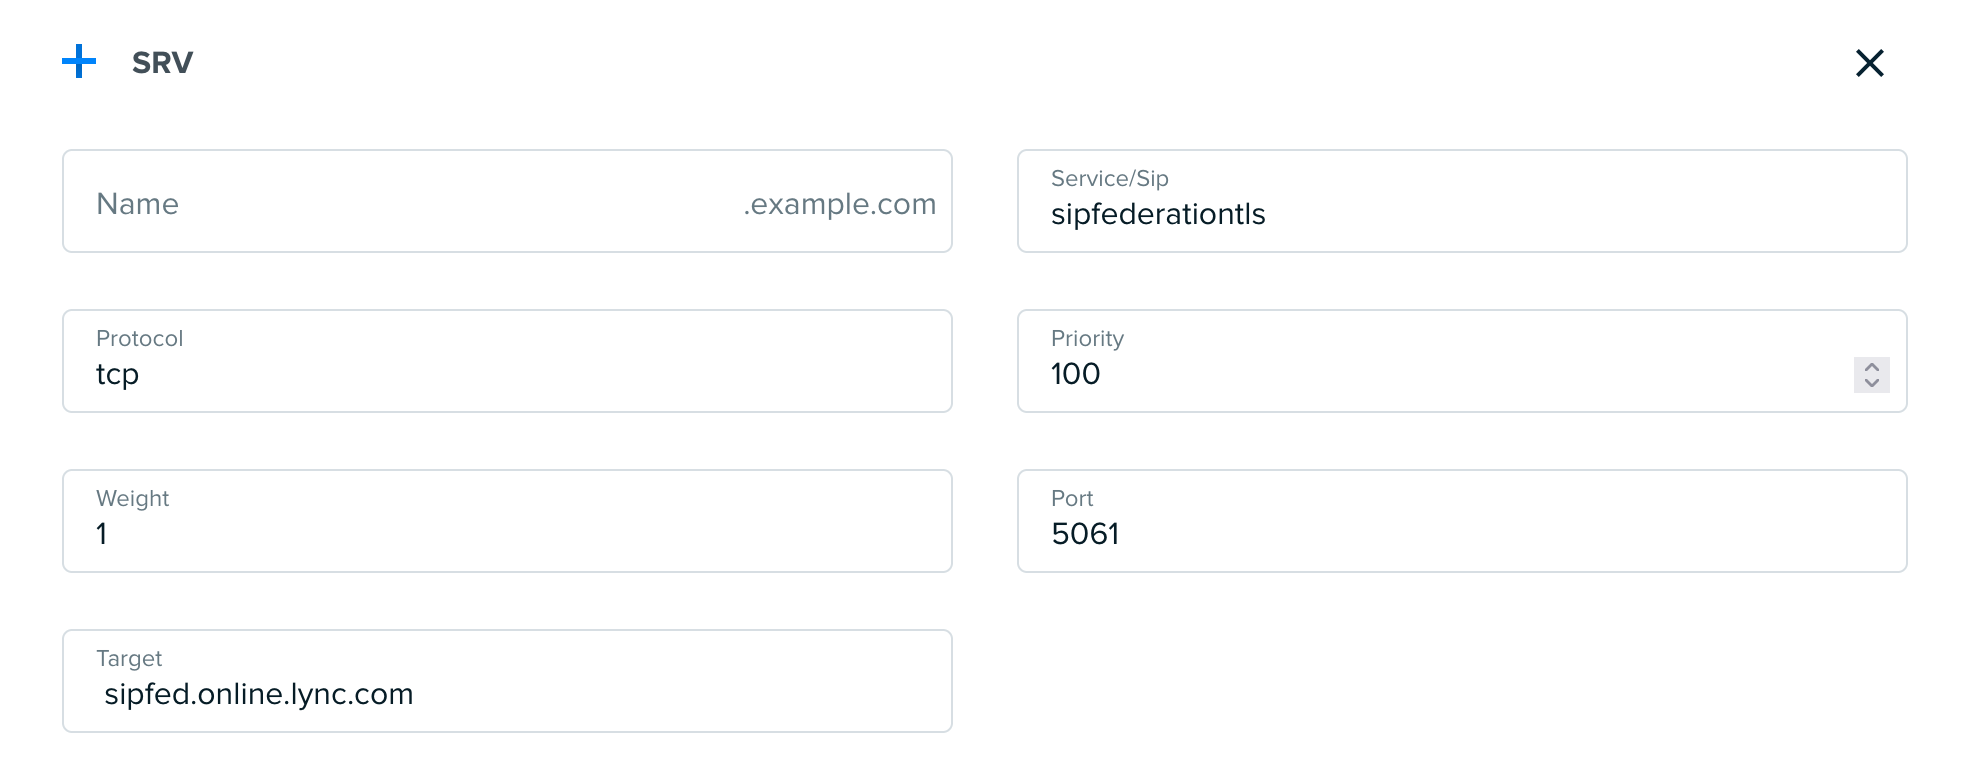
_sipfederationtls._tcp SRV 100 1 5061 sipfed.online.lync.com.
Repeat the following steps to add any additional SRV records required.
- Click the Add Record button.
- Hover over the SRV Record section and click the ADD link.
-
Enter the following:
When entering an SRV record in your panel, ignore the TTL, class, and SRV fields.
- Name: This is most often left blank. You do not need to add the domain name in the Name field.
- Service/Sip: sipfederationtls. Do not add the underscore before this value, or the period at the end.
- Protocol: tcp. Do not add the underscore before this value.
- Priority: 100
- Weight: 1
- Port: 5061
- Target: sipfed.online.lync.com
- Click the Add Record button.
CAA records
A Certification Authority Authorization (CAA) record is used to specify which certificate authorities (CA) are allowed to issue a certificate for a specific domain name.
- If a CAA record is present, only the CAs listed in the CAA record(s) are allowed to issue certificates for the domain.
- If no CAA record is present, any CA is allowed to issue a certificate for the domain.
These records also give the owner of the domain the ability to set notification rules in case someone requests a certificate from an unauthorized certificate authority. View the CAA policy records article for further information.
Subdomains
Most often, a CAA record is added to the primary domain name (example.com). A CAA record added to the primary domain (example.com) also applies to all subdomains such as blog.example.com. However, a CAA record added to any subdomain will take precedence over the CAA record added to the primary domain name allowing you more control over the subdomain record.
Adding a CAA record
- Click the Add Record button.
-
Hover over the CAA Record section and click the ADD link.
Each CAA record created only applies to a single certificate authority. This means you would need to create an additional CAA record for each additional certificate authority that is allowed to issue a certificate for this domain.
- flag: The value of 1 is used to represent the critical flag. Setting this field to 1 instructs certificate authorities that they must understand the following property tag before issuing a certificate.
-
tag: Choose from the following:
- Authorization Entry by Domain This sets the issue property. The domain name of a single certificate authority authorized to issue certificates for the domain.
- Report incident by IODEF report This sets the iodef property. Specifies a URL (https://example.com) or email address (mailto:admin@example.com) a certificate authority may report policy violations. Not all certificate authorities support this tag, so there is no guarantee that all certificate issuances will be reported.
- value: The value associated with the chosen property tag.
- Click the Add Record button to save.
Checking the CAA record via SSH
The dig command is often used to query DNS records. Since the CAA record is a new type of record, you must also add type257 when running the command. For example:
[server]$ dig example.com type257
Further reading
View the following links for further information about CAA records.
- en.wikipedia.org/wiki/DNS_Certification_Authority_Authorization
- support.dnsimple.com/articles/caa-record/
- letsencrypt.org/docs/caa/
DKIM record
DKIM records are a way of 'signing' emails to prove they came from you, using DKIM keys publicly listed in your domain's DNS. They are added as TXT records with a specific format. View the DKIM records article for more information.
Nameservers
The Nameserver (NS) records identify the server(s) responsible for answering DNS queries for a domain. NS records added to a subdomain will override the nameservers configured for the primary domain name, delegating DNS authority for that subdomain to the specified nameservers. Subdomain NS records may not appear in public DNS lookups (such as the dig command or whatsmydns.net).
However, if the designated nameservers are configured to serve DNS records for the subdomain (A, TXT, CNAME, etc.), those records will normally propagate as expected. For propagation issues, contact the provider of the subdomain's nameservers.
Visit this article for details on how to set up custom/vanity nameservers.
Unique IPv4 or IPv6 addresses
You can also add a Unique DreamHost IPv4 or IPv6 record to your domain. View the following articles for further details.