Overview
The following explains how to access your DreamHost email on your iPhone (using iOS 17 or later).
To quickly find your email settings in the panel, open the Manage Email page and look for the Email Setup Info link in the upper right. Click the text to open the quick-access instructions for your email address:
-
- Incoming
- imap.dreamhost.com
- pop.dreamhost.com
- Outgoing
- smtp.dreamhost.com
How to configure
The following sections show you how to add and configure an email address on your iPhone.
Adding a mail account to an iPhone
- Tap the Settings
 badge on the home screen of your iPhone.
- The Settings page opens.
- Tap Mail.
- Tap Accounts.
- Tap Add Account.
- Tap Other.
- Tap Add Mail Account.
- The New Account page opens.
- Enter the following information for the email account:
- Name — Your name, which displays on the receiving end.
- Email — Your email address, which is where replies are sent to and is likely be the same as your username.
- Password — Your password.
- Description — Description of this account. This appears as the name of your address on the 'Settings' page of your phone.
- When finished entering your new account details, tap Next in the upper right corner.
- Make sure IMAP is selected, and then enter the following information for the INCOMING and OUTGOING MAIL SERVER:
If you want to configure a POP3 connection, make sure POP is selected instead.
- INCOMING MAIL SERVER
- Host Name — This is either imap.dreamhost.com or pop.dreamhost.com.
- Username — address@example.com (the email address you’re accessing.)
- Password — Password for the email address. If you don’t know what this is, you can request/reset it from the Manage Email section of your panel by clicking the Edit button next to the address.
- OUTGOING MAIL SERVER
- Host Name — This is smtp.dreamhost.com.
- Username — address@example.com (the email address you’re accessing).
- Password — Password for the email address. If you don’t know what this is, you can request/reset it from the Manage Email section of your panel by clicking the Edit button next to the address.
- When finished entering the new mail server details, tap Next in the upper right corner.
- Tap Save in the upper right corner to finish setting up your new mail account.
Enabling secure settings
Secure settings are enabled by default when you create the mail account. This means your port numbers are set to secure ports that use SSL when connecting to the mail server.
It's not recommended you change these values as they should already be set to use secure settings.
You can view your settings by following these steps:
- Tap the Settings
 badge on the home screen of your iPhone.
- The Settings page opens.
- Tap Mail.
- Tap Accounts.
- Tap your email account.
- Tap your email address to view its settings.
Outgoing settings
-
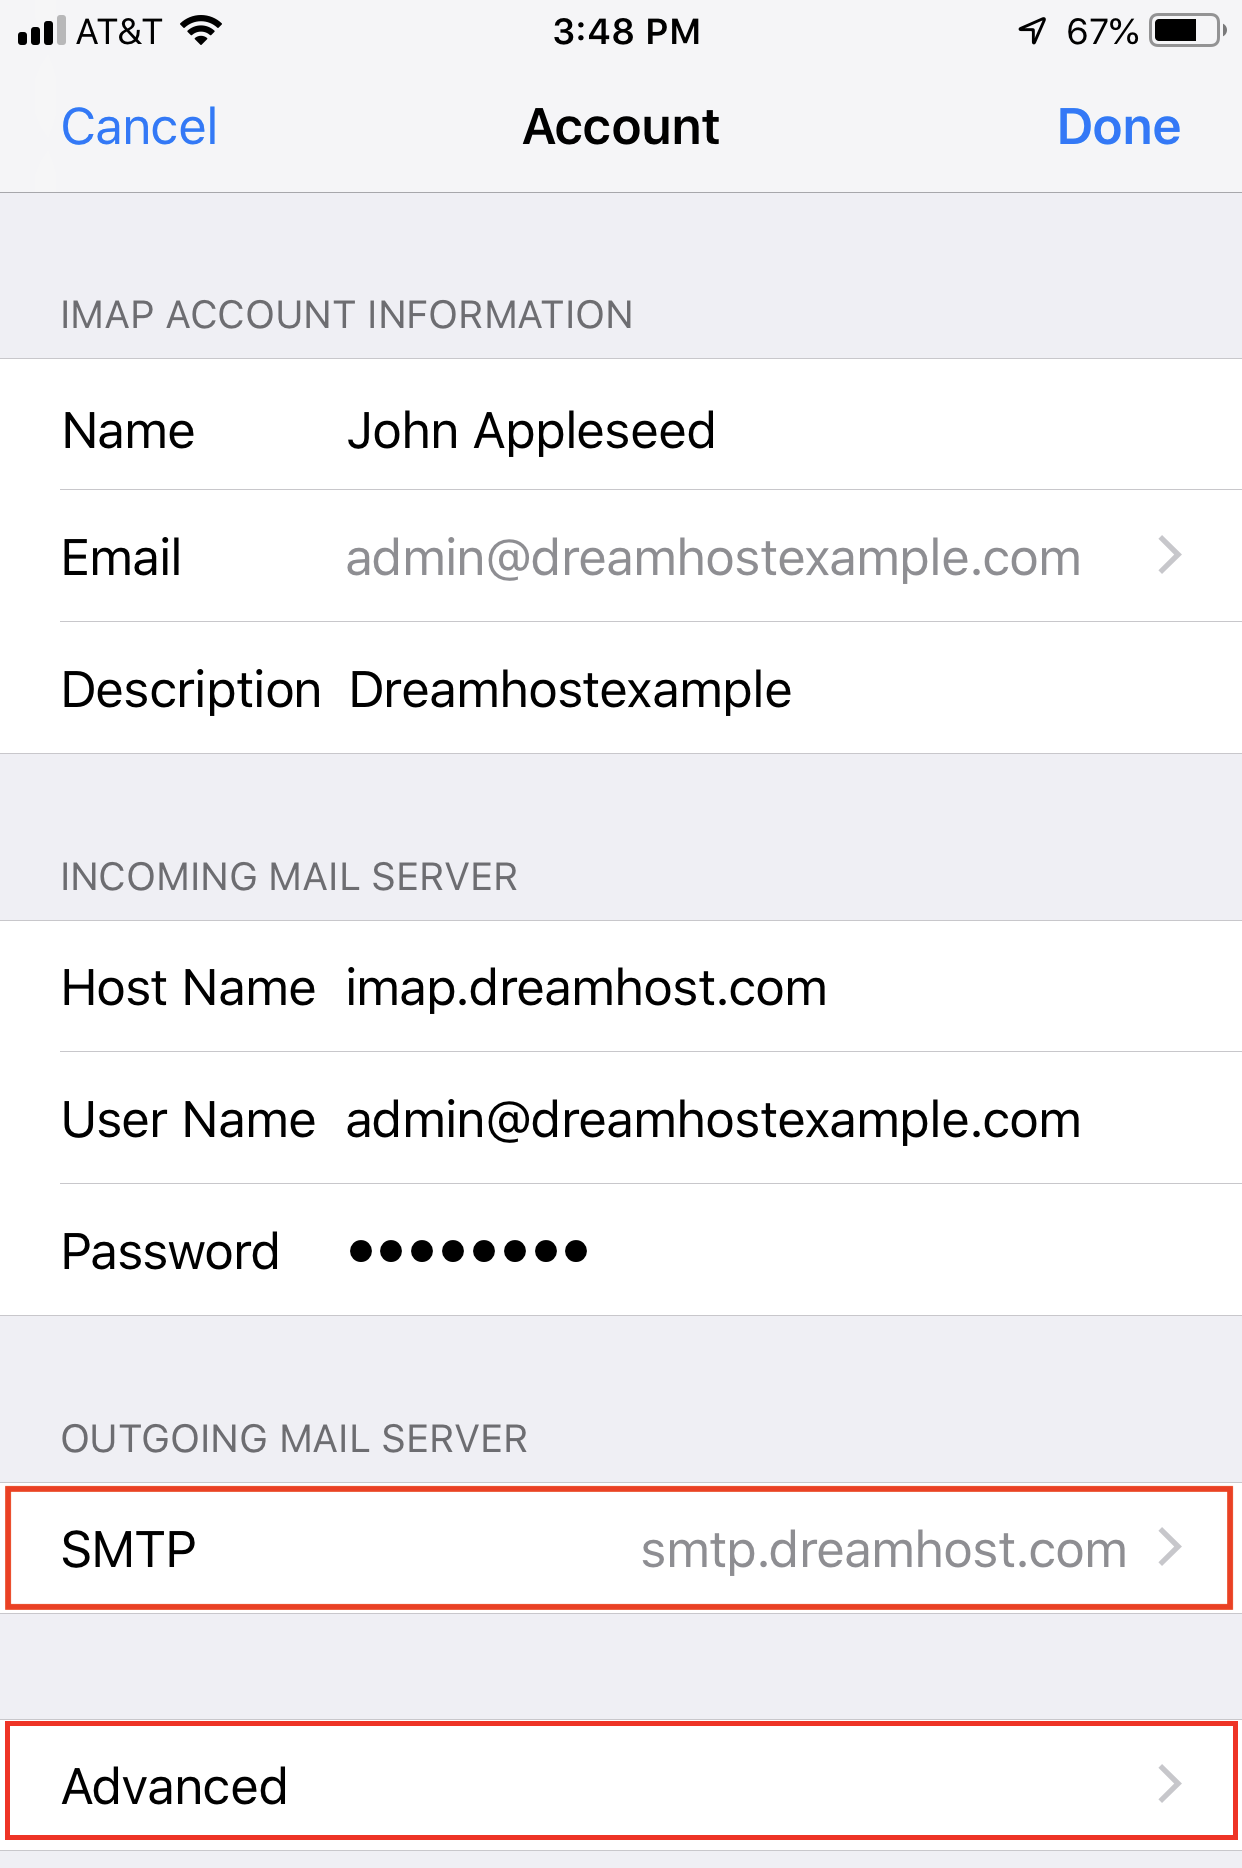
Under OUTGOING MAIL SERVER, tap SMTP. On the next screen, under PRIMARY SERVER, tap smtp.dreamhost.com to view the outgoing settings.
Incoming settings
-
Tap Advanced towards the bottom. Scroll down to view incoming settings.
How to make further adjustments
You can make additional adjustments in the Account Settings menu on your iPhone.
Adjusting the mailbox behavior
Depending on your iPhone iOS version and configuration, you may need to adjust the Mailbox Behavior settings to ensure that your email appears in the designated folder on the DreamHost mail server.
- Tap the Settings
 badge on the home screen of your iPhone.
- The Settings page opens.
- Tap Mail.
- Tap Accounts.
- Tap your email account.
- Tap Advanced towards the bottom.
- Under MAILBOX BEHAVIORS, tap Drafts, Sent, Deleted, or Archive.
- A page opens that allows you to select a folder on the server.
Your messages now appear on the mail server instead of on your iPhone folder.
Adjusting push and fetch settings
Push is not available with a DreamHost email account. You must use Fetch or Manual. See this article for further details.
