Overview
This article explains how to copy emails from your old host to DreamHost using Thunderbird. See the section at the bottom of this article for instructions on copying or importing emails using Mac Mail or Outlook.
What is the general process?
The general process of copying emails involves:
- Adding your old email address to Thunderbird using the old email provider's server names.
- Adding your new email address to Thunderbird using DreamHost's email server names.
- Dragging and dropping folders and emails from the old account into the new DreamHost account.
Copying using Thunderbird
The following describes how to copy your email using Thunderbird.
The steps below use the address user@dreamhostexample.com. Change this to the address you're migrating to DreamHost.

Add your old email address to Thunderbird (using the old email provider's settings)
Contact your old email provider to obtain their email configuration settings to enter into Thunderbird.

Add your new email address to Thunderbird (using DreamHost's email settings)
See this article for a detailed explanation of DreamHost's email connection settings.
At this point, you should have two email addresses (or the same email address twice) added to Thunderbird, each linked to a different mail server.

Drag and drop folders and files
Your accounts in Thunderbird should appear like this:
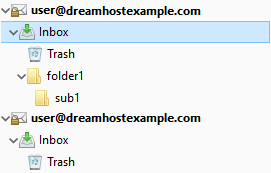
From here, Thunderbird lets you drag and drop files and folders between the two addresses.
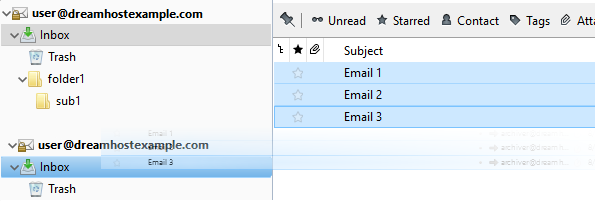
Copying emails from your old Inbox to your DreamHost Inbox
- Select all emails in your old inbox. To select all the emails, click the first email, hold down the Shift key, and then click the last email. They should all be highlighted:
- Drag them from your old email inbox into your new DreamHost email inbox.
- Click your DreamHost email inbox. You should see all emails listed.
Copying folders between email addresses
Folders can be dragged from one email address to another, just like emails. However, Thunderbird will sometimes copy over the folders without also copying their contained emails. To ensure that all your data is copied over, DreamHost recommends that you drag over your folders first and then drag the emails within each folder.
Your emails are now copied to your new DreamHost email address.
Using other email applications
See the following articles for instructions on importing emails using Mac Mail or Outlook:
Mac Mail
Outlook