Overview
You can create, edit, and delete your website's files with an FTP client — this article uses FileZilla as the example, though any client works (you can also create and edit files via SSH or the panel's file manager). This article explains how to create, edit, and delete a file via FTP.
Alternative options
You can also use either of the following options to create and edit a file.
- SSH — See this article instead if you'd prefer to create and edit files via SSH.
- DreamHost file manager — DreamHost offers a built-in FTP client in the panel you can use to upload and edit website files.
How do I create a file?
These steps create a new file using an FTP client.
This article uses examples of creating and editing an .htaccess file.
When following these instructions, make sure to choose your actual file and edit it with whatever contents you need.
- Log in to your server via FTP.
- Make sure your client is configured to show hidden files.
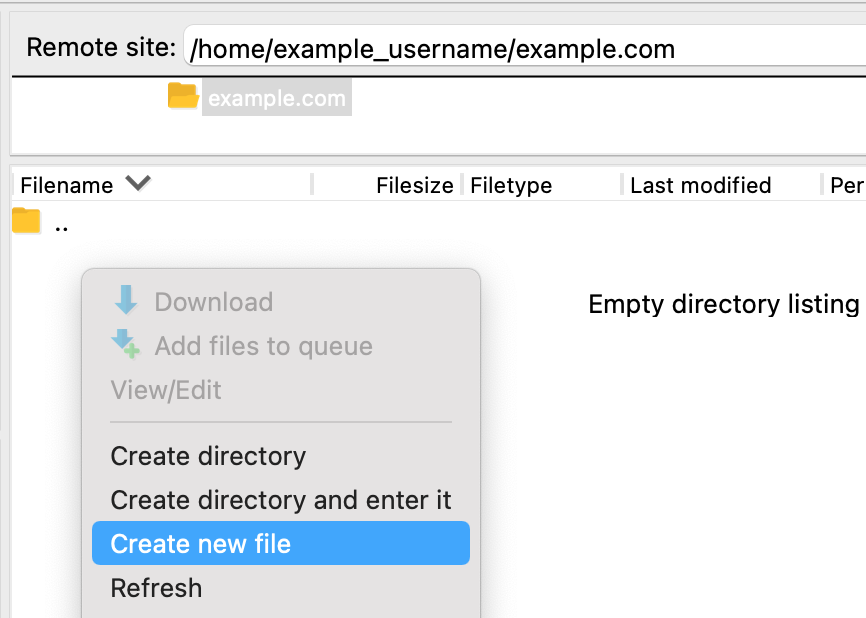
- Confirm you're in the correct directory to create the file. You can see the directory in the right pane. It's a field titled Remote site. In this example, the directory is /home/example_username/example.com.
- Right-click and choose Create new file.
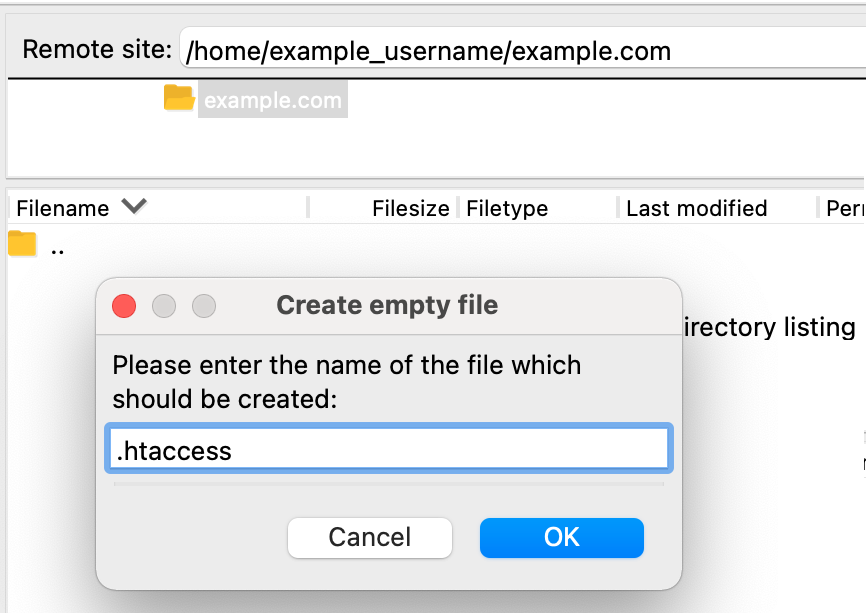
- Enter the file name in the prompt that appears. In this example, a file named .htaccess is created. Click the OK button to save.
You can now see the empty file exists on the server.
How do I edit a file?
These steps edit an existing file.
- Log in to your server via FTP.
- Once you're logged in, confirm you're in the correct directory to create the file. You can see the directory in the right pane. It's a field titled Remote site.
- Right-click the file and choose View/Edit.
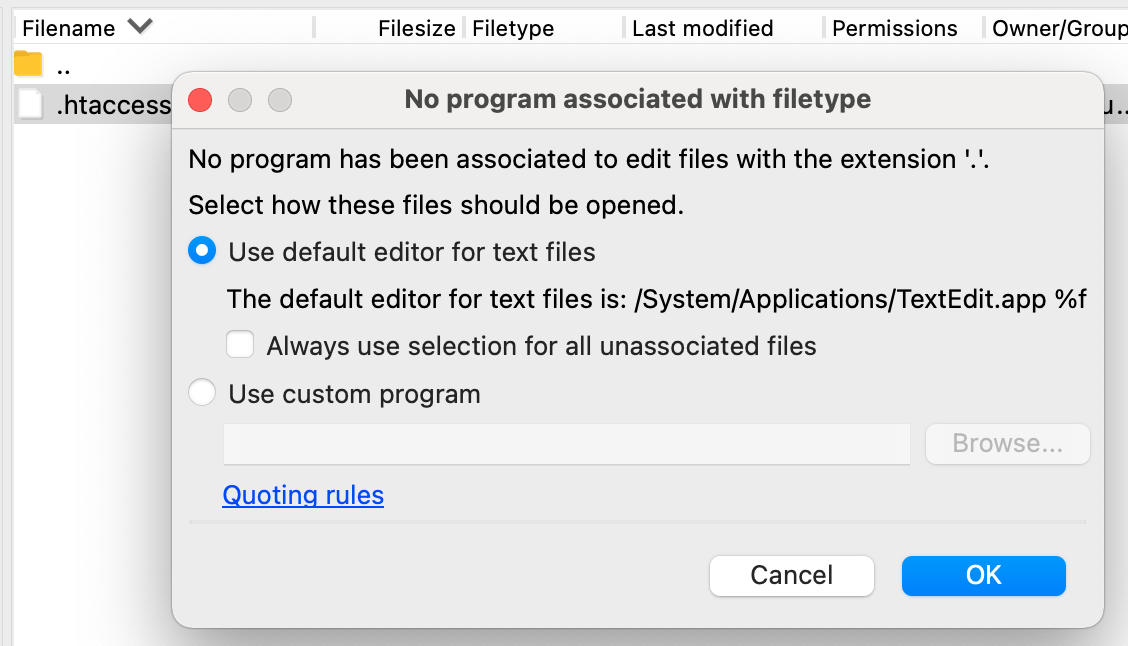
- Choose a text editor from the prompt that displays. You can choose a specific editor you've already installed, but the easiest option is to use the default editor.
For Windows, this program is Notepad.
For Mac, this program is TextEdit.
- Add your text changes to the file.
- Click File > Save to save your updates.
- Check the box and click Yes in the prompt that displays.
The file is now updated on your web server.
How do I delete a file?
To delete an existing file:
- Log in to your server via FTP.
- Once you're logged in, make sure you're in the same directory as the file. You can see the directory in the right pane. It's a field titled Remote site.
- Right-click the file and choose Delete.
- Click the Yes button to delete the file if the FTP client asks you to confirm the action.