Overview
This article explains how to configure a YubiKey device when enabling Multi-Factor Authentication in your DreamHost panel.
Background
YubiKey is a small, low-cost, and durable USB hardware device manufactured and engineered only in the USA and Sweden to prevent device cloning and to mitigate the risk of exposure of its confidential design. In addition to using YubiKey with your DreamHost panel, it can also be used for securing access to a wide range of other applications.
YubiKey is useful for remote locations where cellular service/Internet is not available (network admins in a basement, government employees, etc). See this page for a list of current products.
Purchasing a YubiKey
Visit the YubiKey store to purchase a YubiKey.
What devices are supported?
Only devices that support Yubico OTP will function with DreamHost.
DreamHost does not support the YubiKey FIDO or YubiKey Security Key. Both devices are FIDO U2F, FIDO2, or secure element only, and are not supported in the panel.
Enabling MFA with YubiKey
These steps configure your YubiKey device in the DreamHost panel.
- Navigate to the Security page. The Multifactor Authentication section appears in the lower section on the page.
- Enter the following:
- Current Password: Enter your DreamHost account password.
- Multifactor Authentication Type: Click the dropdown menu to choose YubiKey.
- Click the Get Started button.
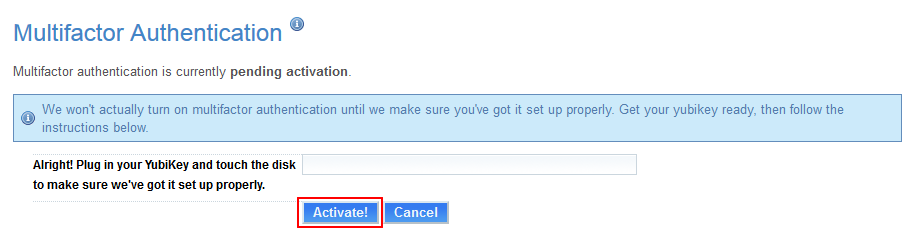
- Plug in your YubiKey, and then touch the disk. It should type letters into the "Passcode" field.
- Click the Activate! button to sync DreamHost's servers to your device.
A Success! message appears along with the backup codes.
DreamHost highly recommends saving the backup codes by writing them down before exiting the page.