Overview
FileZilla Pro is a paid program that lets you manage your server files and connect to cloud storage services such as DreamObjects. This article explains how to connect to your DreamObjects bucket using FileZilla Pro.
In order to use FileZilla Pro with DreamObjects, you must first complete the following steps:
- Purchase, install, and launch FileZilla Pro.
- Create a DreamObjects account.
- Create a DreamObjects user.
- Add a bucket to your user.
How do I connect to DreamObjects using FileZilla Pro?
To configure your account:

Configure FileZilla Pro
- Log in to FileZilla Pro.
- Select Edit > Settings > S3: Providers in the menu.
- In the Providers section, click the Add button to add a new provider named DreamObjects.
- In the Regions section, click the Add button to add a new provider.
- Click the Name field and enter the name corresponding to your bucket's cluster (us-east-005).
- Click the Endpoints field and enter the endpoint corresponding to your bucket's cluster (s3.us-east-005.dream.io).
- Click the OK button in the bottom left to save your settings.

Connect to your DreamObjects bucket
-
Select File > Site Manager... to open the Site Manager window.
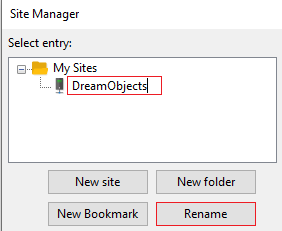
- In the left pane, click the existing default site name. Then click the Rename button to change it to a name you'll recognize, such as DreamObjects. Alternatively, click the New site button to create a new site instead.
- Enter the following in the right pane:
- Protocol: S3 - Amazon Simple Storage Service
- Host: s3.us-east-005.dream.io
- Logon Type: Normal
- Access key ID: Your user's Access key
- Secret Access Key: Your user's Secret key
- Click the Connect button.

Verify the connection
To verify the fingerprints via SSH:
-
Download the certificate:
[server]$ openssl s_client -connect s3.us-east-005.dream.io:443 > dho.cert
This downloads the certificate into a file named dho.cert.
-
Run one of the following commands to view its fingerprint:
[server]$ openssl x509 -noout -fingerprint -sha256 -inform pem -in dho.cert
[server]$ openssl x509 -noout -fingerprint -sha1 -inform pem -in dho.cert
- Open FileZilla Pro and check the following boxes:
- Always trust this certificate in future sessions
- Trust this certificate on the listed alternative hostnames
- Click the OK button.
See also
DreamHost links
Third-party links
- How to connect to cloud storage using FileZilla Pro — FileZilla Pro YouTube Channel
- FileZilla — FileZilla Official Website