
Overview
You can log in to your DreamHost server with PuTTY by entering your server's hostname (port 22, SSH) in a saved session, then your SSH username and password. This article shows you how to configure PuTTY and log in (after you have installed PuTTY and set up an SSH user).
Make sure you complete the following before proceeding:
How do I configure PuTTY to log in?
After you install PuTTY, use these instructions to set up a connection to your server:
Navigate to the directory where you downloaded the PuTTY files.
Double-click the putty.exe file to open.
You can also create a shortcut on your Windows desktop for easy access:
Right-click on your desktop and choose New > Shortcut
Browse to the location of your putty.exe file (it should be C:\Users\bin\putty.exe)
Save the shortcut
The following PuTTY configuration box opens:
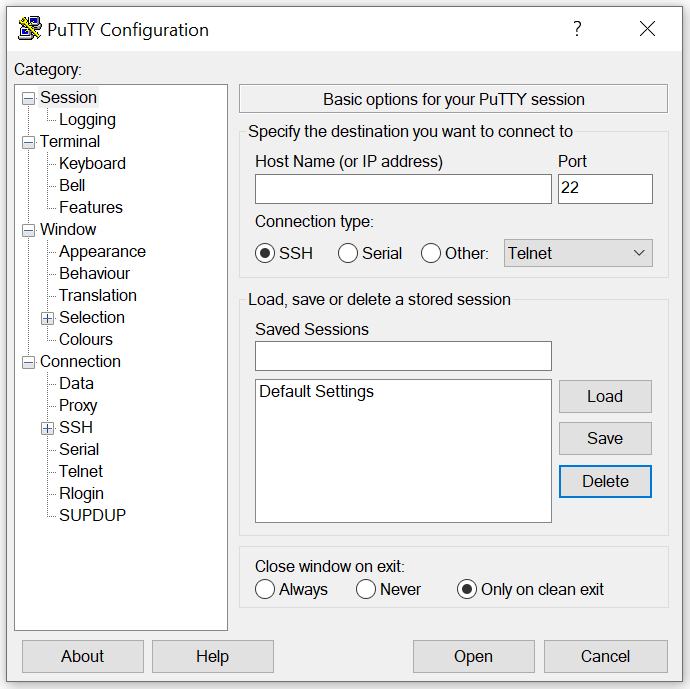
Enter the following information: Field Content Host Name (or IP address) Enter your DreamHost hostname. For example, if your server is named iad1-shared-e1-09, this hostname is iad1-shared-e1-09.dreamhost.com. You can also use your website: example.com. Port 22 Connection Type SSH Saved Sessions Enter a name for this connection (e.g., DreamHost Server).
Click the Save button to save this configuration. The new configuration appears in the Saved Sessions list.
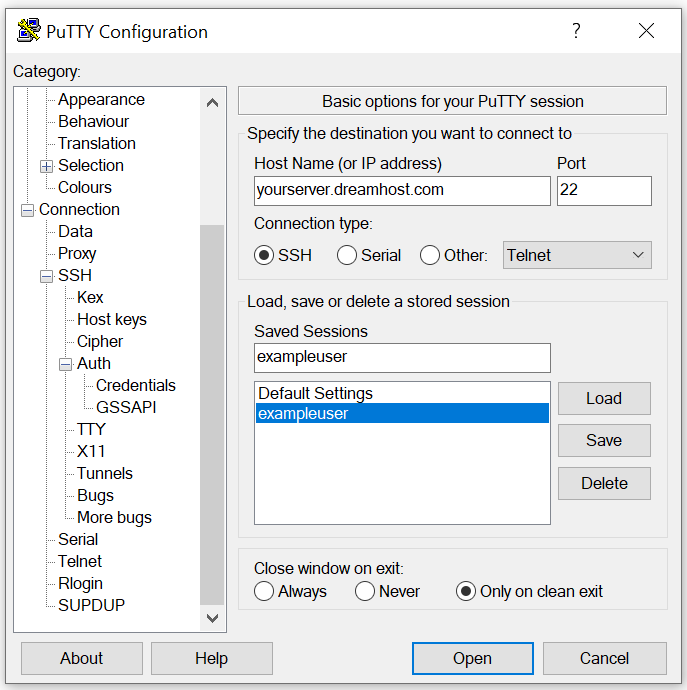
Click the configuration name in the list.
Click the Load button to load your saved configuration.
Click the Open button.
A terminal prompt opens.
Enter your SSH username and click
Enter.Enter your password to log in to your server.
How do I set up passwordless login?
The instructions above allow you to log into your server, but you must enter a password each time. To avoid having to enter your password each time you log in, you can set up a passwordless login configuration. See this article for instructions.
See also
DreamHost links
Third-party links
