Overview
Mac Mail 16.0 (Sonoma) can send and receive your DreamHost email once you add your email account and point it to DreamHost's mail servers using IMAP or POP for incoming mail and SMTP for outgoing mail. This article describes how to configure email in Mac Mail 16.0 (Sonoma).
How do I configure Mac Mail?
To configure email in Mac Mail:

Verify the email address exists in your web panel
Make sure your email address is already set up on the Manage Email page. If it's not on this page, see this article for instructions on adding it.

Choose your email server
Your mail server will be one of the following depending on if you're connecting using IMAP or POP:
- IMAP hostname: imap.dreamhost.com
- POP hostname: pop.dreamhost.com

Configure a new account
- Open the application by clicking the Mail icon in the dock. You can also click the magnifying glass on the top right and type the word Mail into the search bar.
If this is the first time opening Mail, select the Protect Mail activity option and then press CONTINUE. This is an optional step that helps protect your privacy.
- Add an email account:
- If this is the first address you're adding, the mail app opens and asks you to select an account provider.
- If you already have other email addresses configured, click Mail > Add Account... to add this new address.
- Select the Other Mail Account… option and click the Continue button.
- Enter the following:
- Name: This is how you'd like your name displayed when sending email.
- Email Address: This field must contain the full email address.
- Password: This is the password you set up for the email when creating it in your panel.
- Click the Sign In button when finished.
A notification may display reading the name or password cannot be identified. This is normal due to DreamHost's mail server configuration.
- Resolve this error by updating the following three fields:
- Account Type: Choose IMAP or POP (Use IMAP unless you need to use POP)
- Incoming Mail Server: Your mail server name. This is either imap.dreamhost.com or pop.dreamhost.com.
- Outgoing Mail Server: This is smtp.dreamhost.com.
- Click the Sign In button to proceed.
- Choose which apps you'd like to associate with this account and click Done.
Your new email address is now set up and ready to use. Send a test message to confirm it's working properly.
How do I confirm I'm using secure ports?
Your mail application can use either insecure or secure ports, so it's important to confirm it's always using secure ports before sending and receiving email. The steps below help you set up the correct ports for the latest version.
Sonoma
To configure the ports:
- Navigate to Mail > Settings.
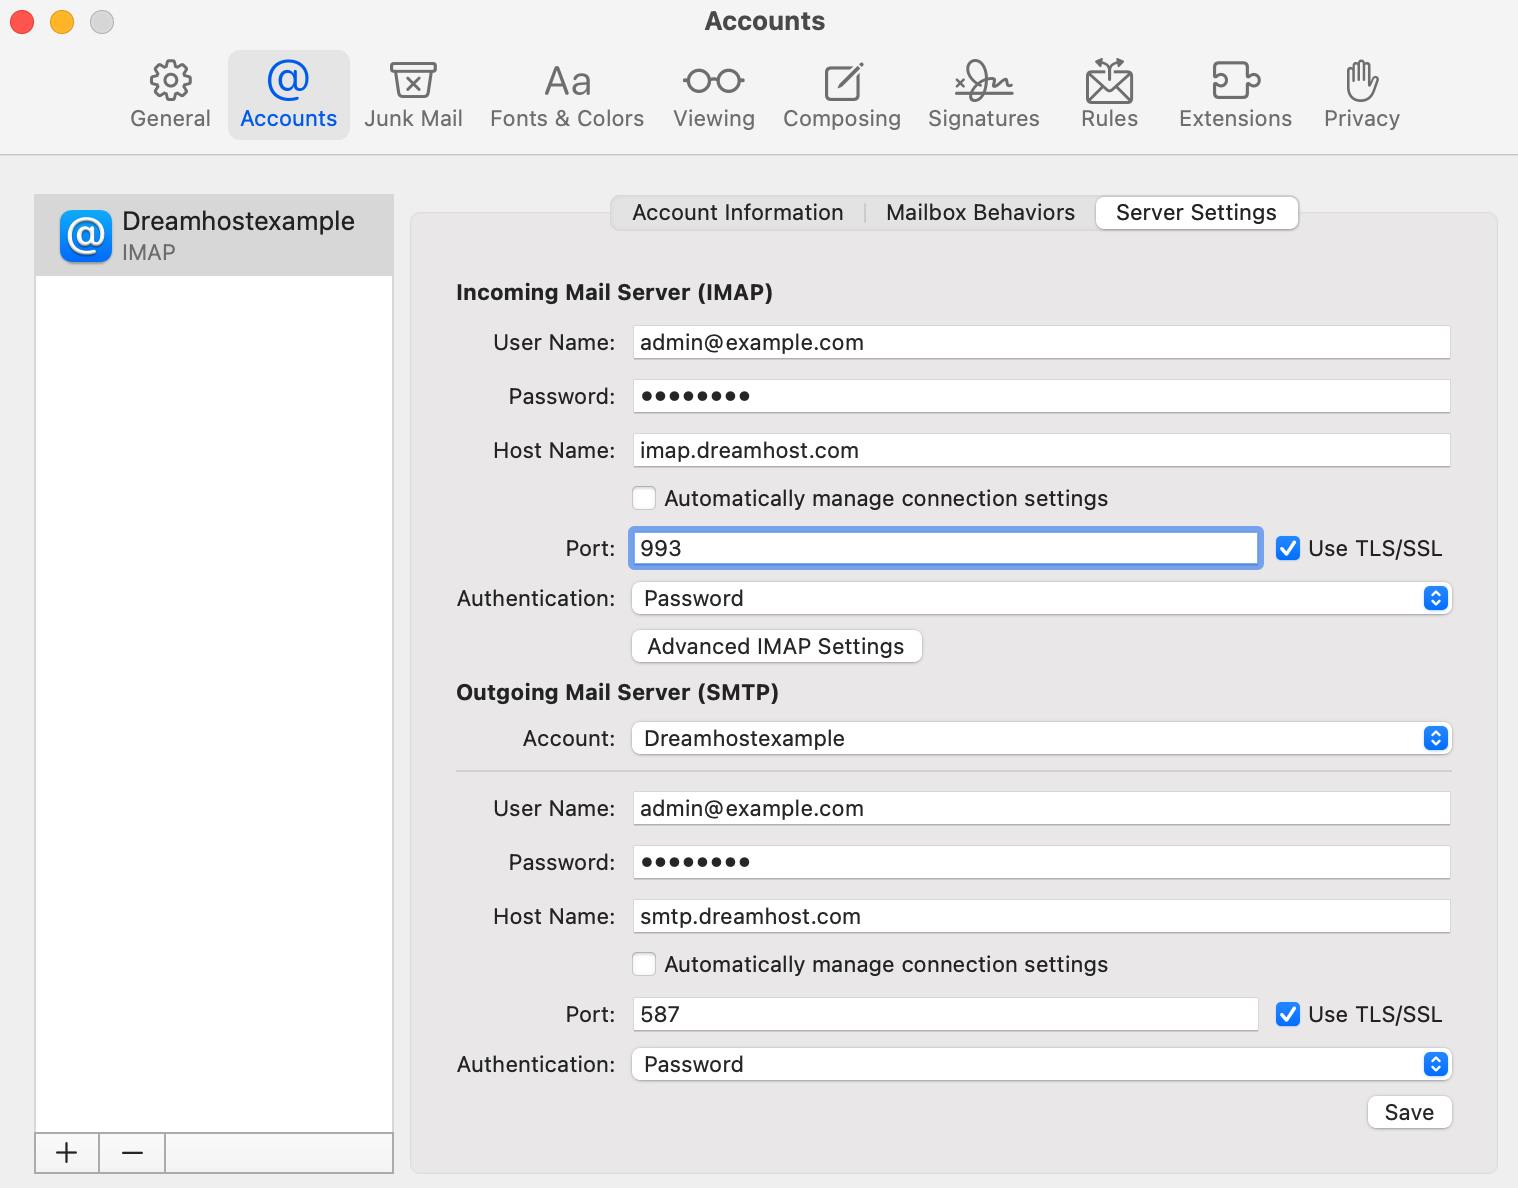
- Click the @ Accounts option in the top bar.
- Click the Server Settings tab.
- Edit the Incoming/Outgoing Host Name fields to match your DreamHost mail server names.
- UN-check Automatically manage connection settings. The Port field and Use TLS/SSL checkbox then appear.
- Edit the Incoming/Outgoing ports as needed. It's recommended to use incoming values of port 993 for IMAP and 995 for POP.
- Click the Save button when finished.
See also
DreamHost links
Third-party links
- Mail Support – Apple Mail Support
- Add email accounts in Mail on Mac – Apple Mail Support