Overview
You can connect to your DreamHost database using MySQL Workbench in two ways — through a secure SSH tunnel or using passwordless login:
Prerequisites
Make sure you have downloaded MySQL Workbench and have completed the following before proceeding.
- Located your website username and password
- Located your database username and password
- Created a Shell user and are able to log into your server via SSH.
If you're running DreamPress, you can locate your credentials using the following articles:
How do I update my Allowable Hosts field in the panel?
Before you can connect to your database, you must give your local machine permission to connect to the database server. You can do this by adding information to the Allowable Hosts field in your panel.
- Navigate to the MySQL Databases page in the panel.
- Under the Database(s) on this server: section, find the desired database, then click the user name link for the user you wish to grant access.
- Scroll down to the Allowable Hosts section. You must include one of the following:
- Your public IP address
- Your public originating domain/subdomain
There are two ways to find your IP address.
Option 1 — Online tool
Visit the site What is My IP?, which displays your current IP address.
Option 2 — The DreamHost panel
Your IP address is displayed under the Allowable hosts section.
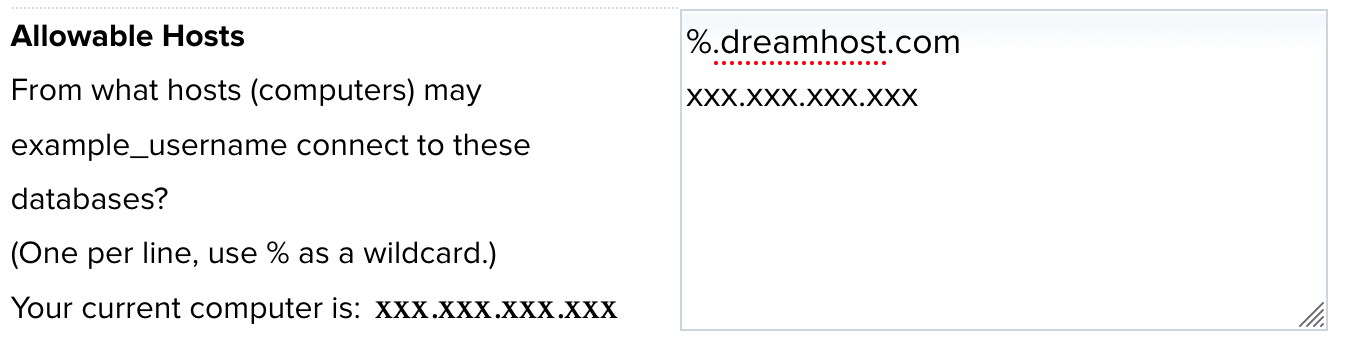
You can copy and paste this IP address into the Allowable Hosts field.
Troubleshooting
- Enabling %.example.com by itself does not enable the hostname example.com.
- If you receive an "access denied to username@xxx.xxx.xxx.xxx-ip.provider.info" error, try adding a wildcard to the end of your IP (such as xxx.xxx.xxx.xxx%).
- If that doesn't work, add the full URL of your provider in the message.
- Click the Modify [username] now! button when finished.
How do I connect using MySQL Workbench?
The following two options are available to connect to your database using MySQL Workbench.
Option 1 — Connect using a secure SSH tunnel
This method is preferred over less secure methods as it provides point-to-point encryption and does not expose your MySQL account to potential hacks from allowed networks.

Enter your SSH and database credentials
The following window opens for you to create a new connection.
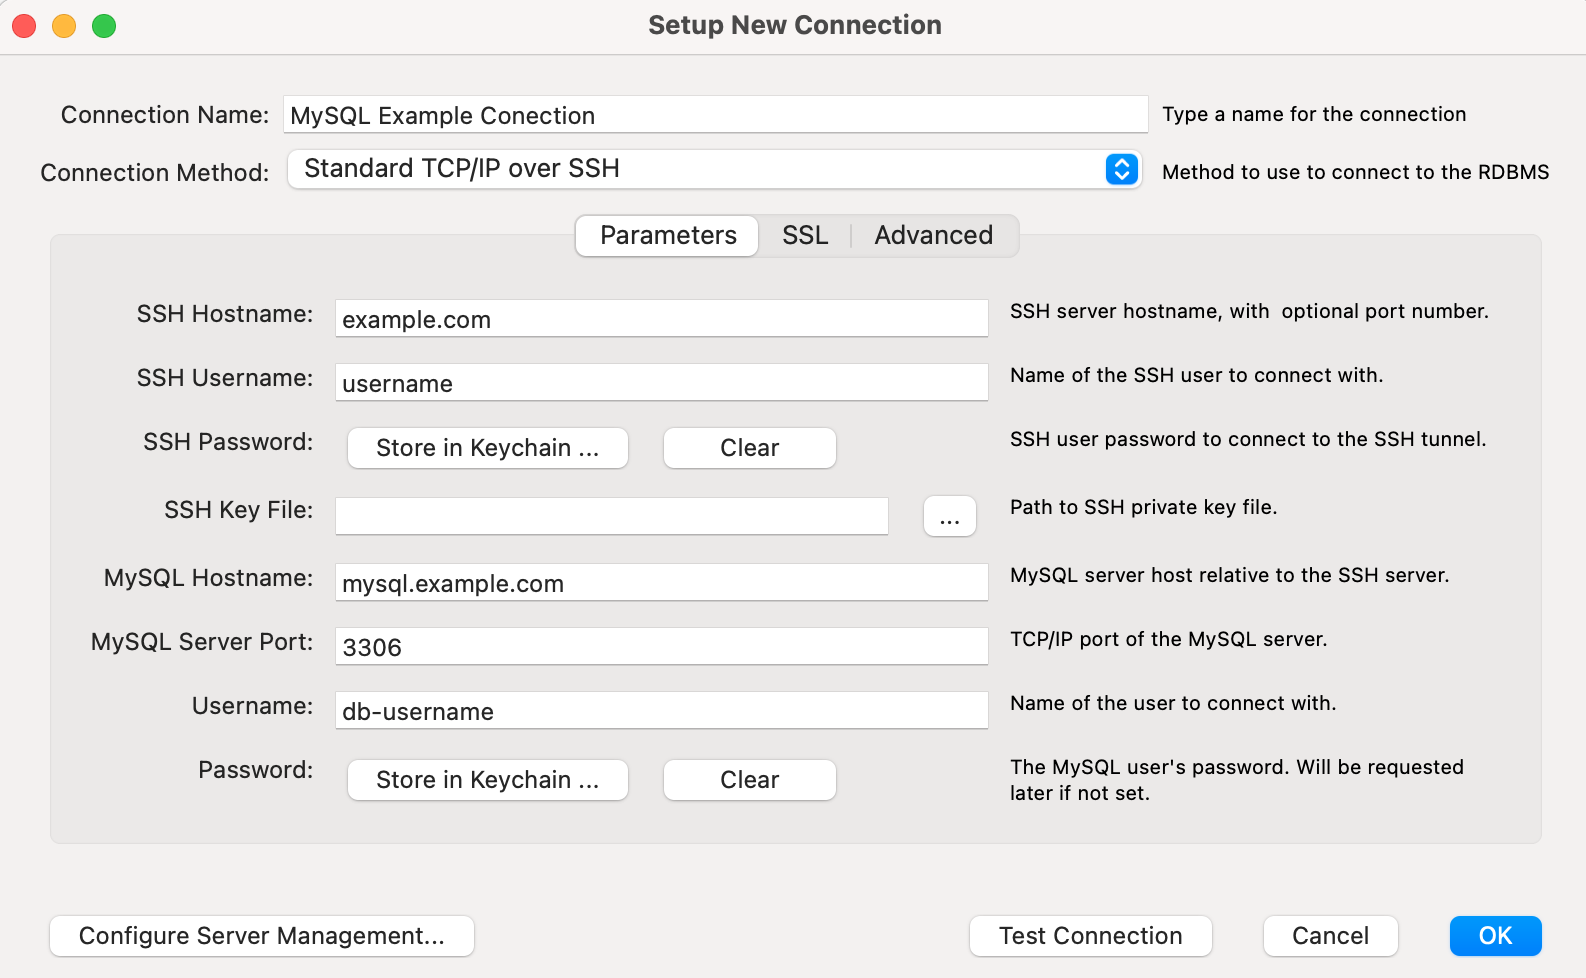
Configure the following:
- Connection Name: Enter anything you like to name this new connection.
- Connection Method: Select Standard TCP/IP over SSH.
- SSH Hostname: Enter your website name.
- SSH Username: Enter your SSH username.
- SSH Password: Click the Store in Keychain button to enter your SSH user's password.
- MySQL Hostname: Enter the hostname for your database.
- Port: 3306.
- Username: Enter your database username.
- Password: Click the Store in Keychain button to enter your database username's password.
- Click the OK button to log in to your database.

Confirm the connection
The first time you connect, you may see a warning about the authenticity of the connection.

This is normal the first time you connect, as you can read about here:
Confirm that the fingerprint matches the one in your panel, then click the OK button.
Option 2 — Connect using passwordless login

Configure Passwordless login
View the following articles to enable Passwordless login. This step uploads the public key to your server and downloads the private key to your computer.
The private key you load into MySQL Workbench must be in OpenSSH format, or you cannot connect. MySQL Workbench states the following for PuTTY keys:
MySQL Workbench does not accept default PuTTY keys directly. However, you can convert an existing PuTTY Private Key (ppk) file to OpenSSH format using the PuTTY Key Generator (PuTTYGen) utility.
Enter your SSH and database credentials
The following window opens for you to create a new connection.
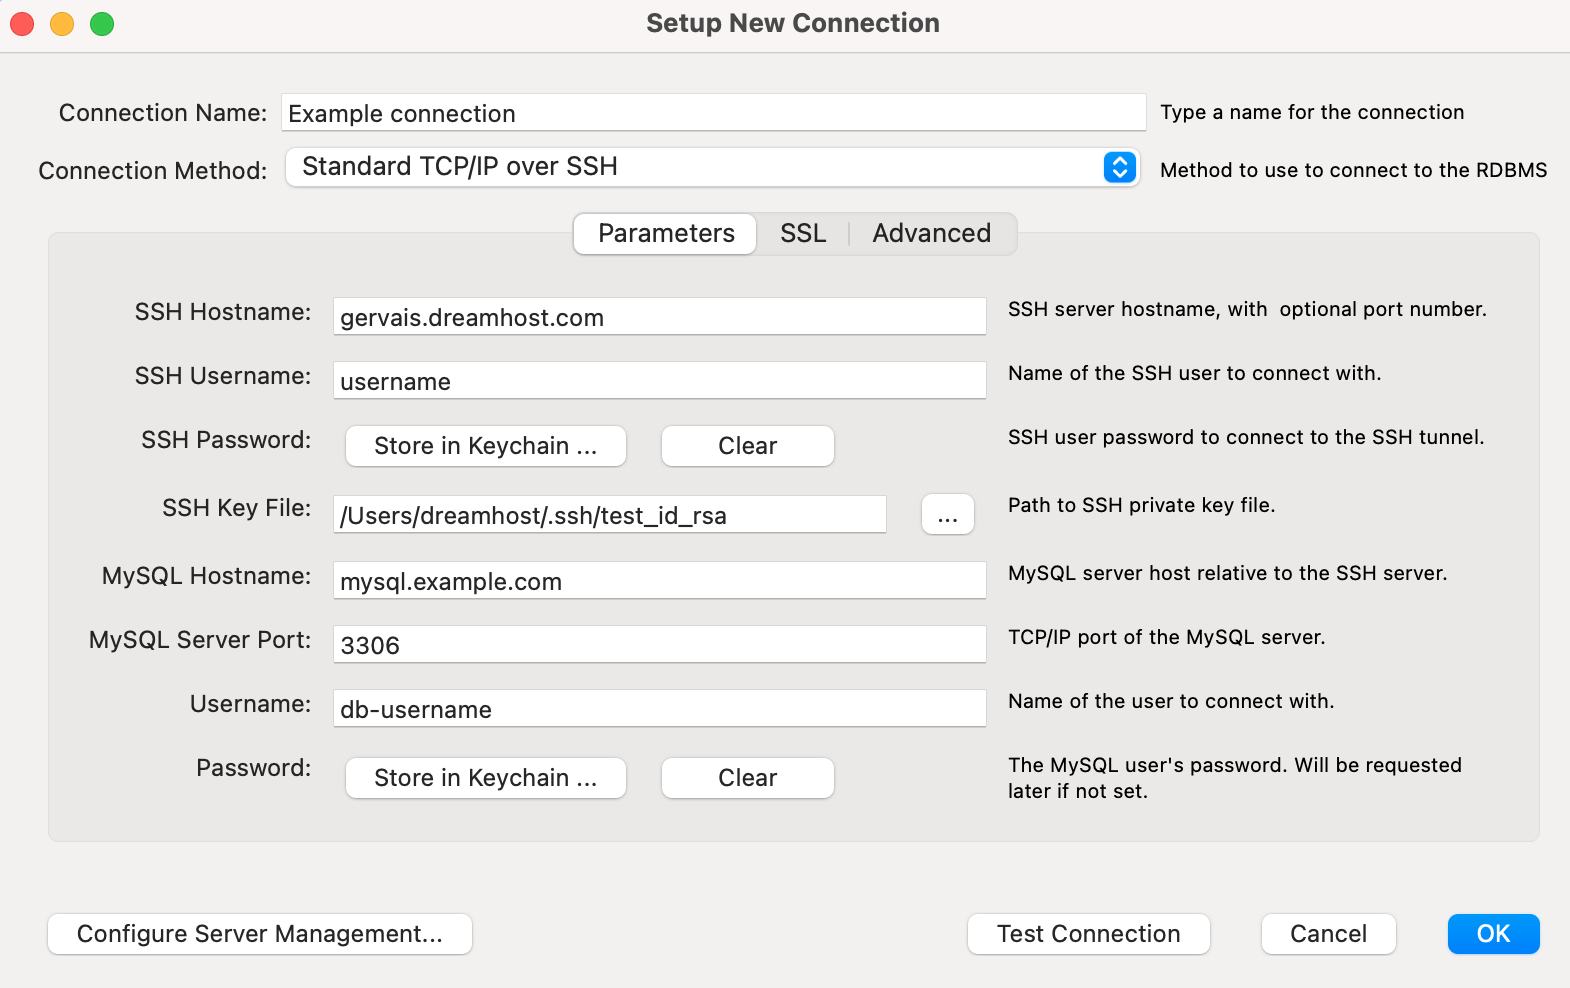
Configure the following:
- Connection Name: Enter anything you like to name this new connection.
- Connection Method: Select Standard TCP/IP over SSH.
- SSH Hostname: Enter your server name.
- SSH Username: Enter your SSH username.
- SSH Password: Do not click Store in Keychain.
- SSH Key File: Click the ... button and search for your private key on your computer.
- MySQL Hostname: Enter the hostname for your database.
- Port: 3306.
- Username: Enter your database username.
- Password: Click the Store in Keychain button to enter your database username's password.
- Click the OK button to log in to your database.

Confirm the connection
The first time you connect, you may see a warning about the authenticity of the connection.
This is normal the first time you connect, as you can read about here:
Confirm that the fingerprint matches the one in your panel, then click the Ok button.