Overview
The DreamHost control panel (panel.dreamhost.com) is where you manage your account and services — websites and hosting, domains, email, servers, billing, and support. This article provides an overview of how to log in to the panel and the sections it contains.
How do I log in to the DreamHost panel?
To log in to your DreamHost panel:
- Navigate to panel.dreamhost.com.
- Enter your primary email address linked to your account and the password, or use the Sign In with Google method using your Gmail address.
- Click the Sign In button.
-
If you forgot your password, click Click here to reset and follow the instructions.
Only the primary email set up on your account can reset your password using this link. If you require other people to access your account, you must set up Account Privileges for each new user.
If you’ve enabled Multi-Factor Authentication (MFA), your login screen looks like this:
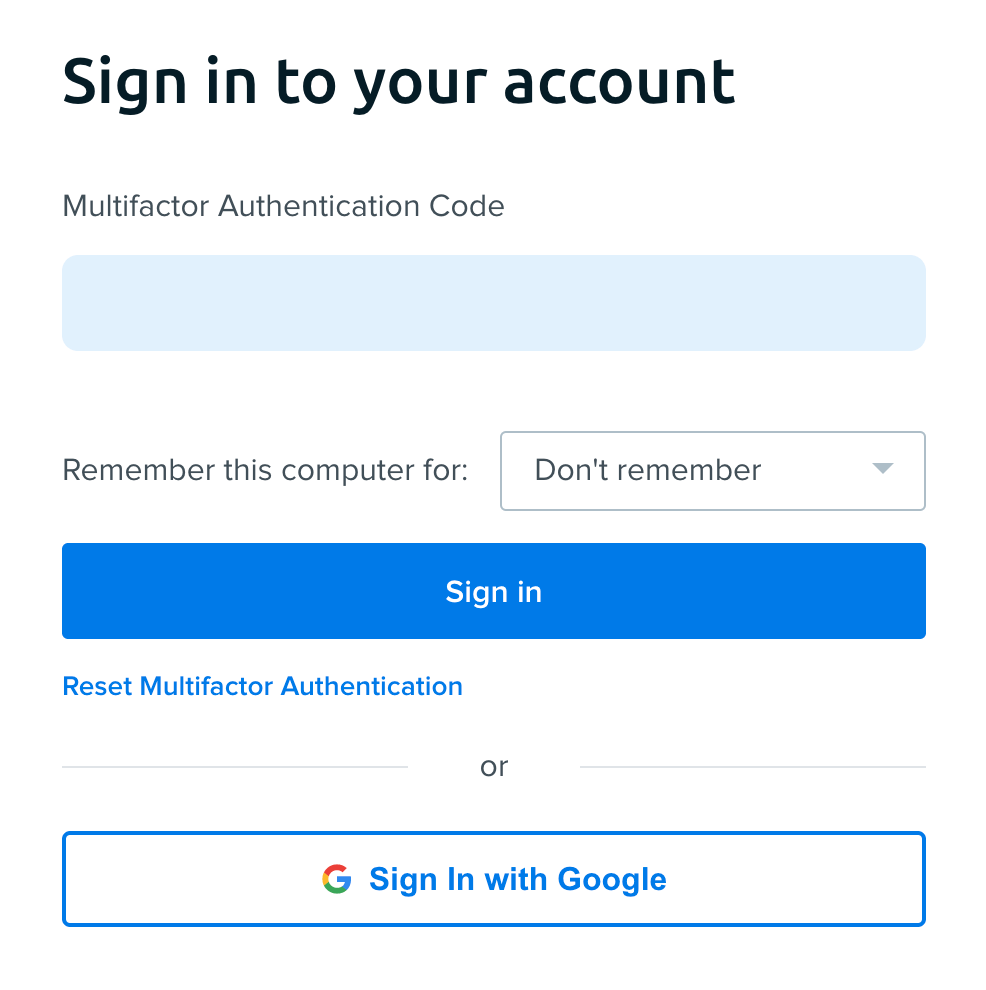
- Enter the MFA code and then click Sign In. For details on this service, see the Enabling Multi-factor Authentication article.
The control panel includes the following sections, which allow you to manage various aspects of your account.
The Main Menu is the primary list for all the pages in your panel, which appears as a vertical list on the left. Each section has a description of the various actions you are able to perform once they’re selected. Each of the items is described in the following table:
| Menu item | Description |
|---|---|
| Home | Displays an overview of your account activity and website status, access to alerts, updates from DreamHost, offers, and key management tools. |
| Websites | Manage domain services such as hosting, DNS, MySQL databases, and SSL/TLS certificates. A file manager is also available for you to log in to your server. |
| Remixer | Create and publish a website using DreamHost's AI web app builder — no coding required. |
| Domain Names | Manage domain registrations and transfers. |
| Manage email services such as filters, Discussion Lists, MX records, and more. | |
| Pro Services | Provides a range of professional services for website enhancement. See this article for more details |
| Servers & Usage | Provides a dashboard to configure your servers (including VPS and Dedicated Servers), and view SSH keys. |
| Cloud Services | Provides access to DreamObjects and DreamCompute services. This menu item only appears if you've enabled these services. |
| Billing & Account | Provides links to manage your account, make payments, and more. |
| Business Tools | Provides access to tools like DreamHost's AI Business Advisor. |
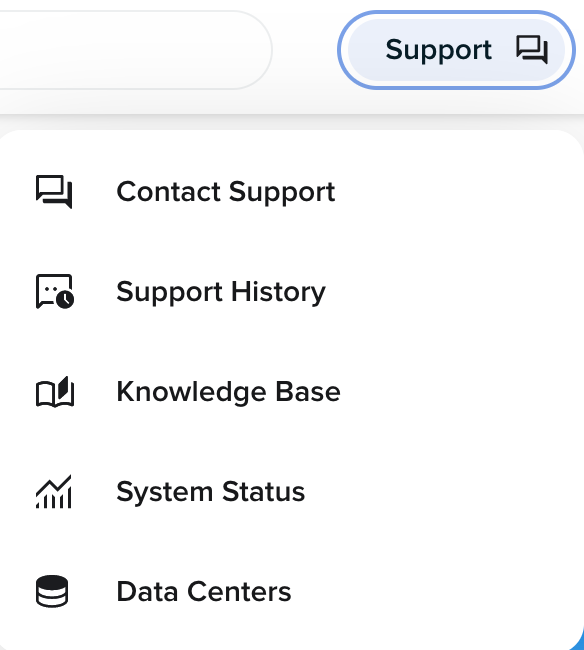
| Support | Provides links to the Knowledge base, panel help links, data centers, and the Contact Support page. |
| More |
Lists additional services to further manage your sites. For example, you can create cron jobs, set up an .htaccess file to password-protect your site, and much more. |
Add Product (section)
This section appears at the bottom of the left menu.
If you don't see any of the sections mentioned above in the main menu, you can add them within this section.
Search field box
While you can navigate the panel using the main menu described above, you can also use the search box in the upper right of your panel:
![]()
The top right of the panel lists options that are described below:
| Menu item | Where it links | Description |
|---|---|---|
| Contact Support | Contact Support | Links you to the panel support page where you can submit a ticket. |
| Support History | Support History | Links you to the panel support page where you can view any previous support interactions or messages from DreamHost. |
| Knowledge Base | https://help.dreamhost.com/ | DreamHost's Knowledge base that contains articles to help customers find solutions to any issues they may have. |
| System Status | https://www.dreamhoststatus.com/ | Opens the DreamHost Status page where you can view any updates regarding scheduled maintenance or unscheduled downtime. |
| Data Centers | Data Centers | Clicking this opens the Data Centers page, where you can view the location of your DreamHost servers. |
Account Information
On the top right of your panel, click your user icon to open the following account information box.
| Menu item | Where it links | Description |
|---|---|---|
| Profile & Privacy | Contact Information | The Contact Information page allows you to change your contact information, email address, and language for your account. See the Updating contact information article for more information. |
| Billing & Payment | Manage Account | The Manage Account page shows a list of your active account services, such as hosting plans, servers, users created, mailboxes, domains, and databases. |
| Security | Security | The Security page allows you to configure Multifactor Authentication and change your password. |
| Language | Dropdown | Allows you to adjust the language in the panel. You can also change the language on the Contact Information page. |
| Logout | Button | Allows you to end your current session in the panel. |